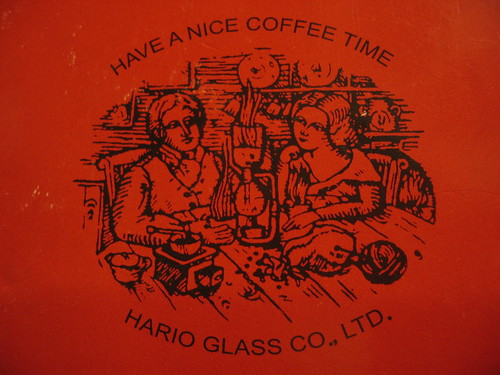
Forward: With Syphon brewing becoming tragically hip lately, we decided to go back and do a comprehensive look at our development in this Simon Hsieh inspired methodology for the Hario TCA-2 and how it has expanded in our community.
We started getting deep into Syphon more than a year ago. It was when we had access to some of Simon Hsieh's coffee and were inspired to understand more that we became serious. We adopted his methods off his blog and began an exchange with him about coffee and brewing in general that has really shaped our current direction away from where our community was headed (see Clover) at the time. We quickly adapted as much as we could understand and began quantifying the methods. We spent time evaluating why each step was important in the brewing process and where could we go with it. We attempted a basic video that got solid feedback and that was the beginning of a series of steps focused around Syphon brewing and demos.
We did demos here in town for small groups, traveled out west for a friend's Jam, and shared the methodology with others who were interested. Which brought us back to the beginning when Simon Hsieh visited us in the US. Some hands on technique was applied and some extra movements were removed to simplify and refine our brewing method. A few autographed copies of his book for good measure and a Syphon demo event topped the visit.
Fast forward to the future and you see competing methods being posted on other sites and more discussion about this old school method but more to the point, three of the six USBC finalists use a version of our preferred method!
So as we are moving on to new subjects we decided to compile a comprehensive primer and updated video people can use based on our experience. This is especially relevant as we now have the TCA-2 for sale at the brick and mortar shop. Enjoy~
The Complete Syphon Primer
Barismo Syphon Primer Demo

Showing posts with label vac pot. Show all posts
Showing posts with label vac pot. Show all posts
Sunday, September 21, 2008
barismo: Syphon Coffee Primer
by Benjamin Chen (based on Simon Hsieh method).
For brewing with a Hario TCA-2
Before you start:
1. Rinse your filter in hot water and wash with cold water until it runs clear.
If this is a new filter, run through the brewing once without coffee to get rid of the cloth smell.
2. Rinse your Syphon to make sure it's clean. Check for cracks, Dry all exterior and make sure the lower globe is secured.
3. Hook the filter to the top. Make sure it's centered.
4. Pre-boil water in kettle and prepare a cold, damp towel.
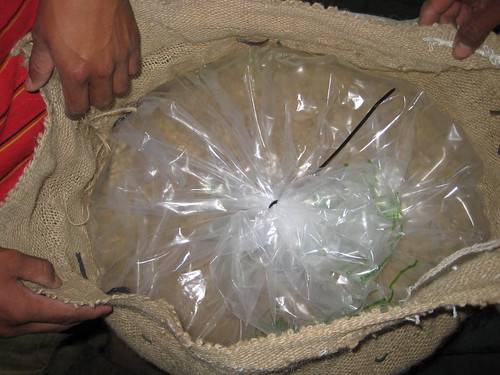
5. Place ~35g of beans in the grinder. Run a little bit through to clean up previous grinds.
Heat-up:
1. Fill hot water to the "2" mark on the side of the lower globe. These are little number inside a cup logo near the "hario" mark. (this works both for TCA-2 and TCA-3).
2. Insert upper chamber at an angle into the lower globe. DO NOT seal the top.
Make sure there is a gap for steam to escape.
3. Start your burner and place it in the center of the globe. Set it at max to speed up the heating.
4. Grind the bean into a container/cup. Scoop from the top, 32g of coffee into another cup. I recommend using the cupping cups. They are of nice size. Try to finish this step as close to "drop" as possible, but you can grind/weight before step 1 to avoid messing up.
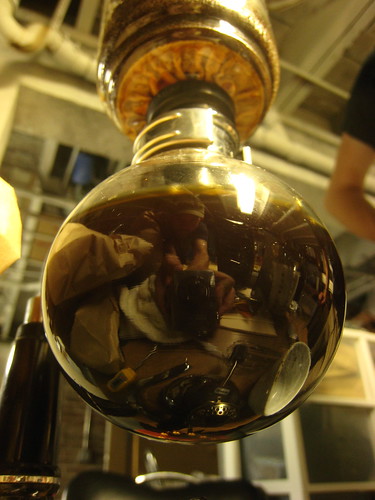
5. Watch the water in the lower globe start to boil. At the sign of boiling (rapid bubble formation), straighten the top and lightly seat it. Do not "push/seal" the top hard. A very gentle downward pressure is enough. Make sure the top is center and straight.
6. Place the thermometer probe on top, near the bottom of the chamber, away from the center.
Adjust the burner to as low as you can without water falling from the top globe.
7. Watch the temp on top stabilize. There should only be very tiny bubbles and no turbulence. If you have leakage from the side, shift the filter with the stirring paddle until it's sealed. If you cannot get rid of that, start over and re-adjust the filter.
9. If your stabilized temperature is less than 91C, replace the top and increase the heat until it increase to 91C. If the temperature is more than 91C, stir the water on the top w/ your paddle rigorously until it decrease to 91C. (note: 91C is your target brewing temperature. Adjust per degree or roast... see further notes at the end).
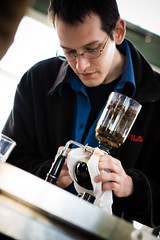
10. Get your stirring paddle, coffee, and timer ready to go.
Drop:
1. When water temp stabilizes to 91C, take out the thermometer probe.
2. Hold the coffee on your left hand and stirring paddle on your right.
3. Dump the coffee into the top chamber and immediately start the timer with your pinky finger.
Start your stirring immediately.
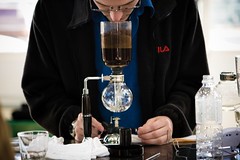
1st stir:
Below is my personal technique. You can do whatever you want. Just make sure you do not create any vortex, saturate the coffee completely, and finish your move in 5 sec. The faster the better.
Longer/vortex stir will result in bitterness in the cup...
1. Holding the paddle like a pen with the flat section parallel to the "x-axis" (left-n-right).
Starting on the left most of the "circle", stick the paddle into the coffee.
Move the paddle in a "N" motion (up, down, up) toward the right. You should be able to do 4 "stokes" in about a second.
2. Repeat the motion along the "y-axis" if you felt more agitation is needed.
3.Start from the very top (+Y), "scrape" the side of the top clock-wise 180 degrees.
Repeat the motion counter clock-wise.
If you did the stirring correctly, you should have something like this:

If you do not see the pale "crema" on top, that means your grinds are not fully saturated. Don't be afraid to REALLY stir up the grinds (as long as you don't create a vortex/whirlpool).
Stirring is the hardest part of the whole thing. Takes some practice to get use to. Whatever you do, make sure everything is well mixed, no vortex is created, and do it in 5 seconds.
An Aeropress paddle works REALLY well for stirring ;-)
*Tip about stirring: a lazy rhythmic motion actually works better than fast and violent motion.
Basically you are creating "waves" that crash into each other, mixing the top and bottom layer of the coffee.
2nd Stir:
When the timer hits 30 seconds, do a second stir. Sometimes when the coffee are fresh, it will be really sticky and you will felt like you aren't stirring at all. Make sure you DO stir it well like your first stir. You should see mostly black layers of coffee when you are done.
3rd Stir:
1. At 55 sec mark, turn off the heat and remove the burner from the lower chamber. Stir immediately. When done properly, you should only have a top layer of light-colored coffee of no more than 1/4" (~6 mm) thick. (Note: After your stir, pay attention to how much coffee remained on the top. The thicker the layer is, the less of extraction it got. Work on your stirring if it's the case.)
Draw down:
1. Immediately after 3nd stir, wrap the cold, damp towel on the upper left side of the lower globe near the "neck" (right side is where the handle is). Make sure the wet towel does not touch the lower portion of the bottom globe where the flamed touched.
2. The draw-down should be around 30~50 seconds. Darker roast and higher dose will increase the draw-down time. Longer drawn-down results in continued/over-extraction and will cause bitters in the cup.
Clean up:
1. When the draw-down is complete, wrap the towel with your left hand around the neck of the vacpot (the metal ring); holding the top with your right near the top rim, gently rock the top back and forth until it comes loose. Careful it's a bit hot.
2. Holding the top with your left hand, gently tap the rim downwards with your right to loosen the grinds. Dump the spent coffee and rinse with water.
3. Release the hook and take out the filter. Wash both top and the filter as clean as you can.
4. Place the filter in a small cup of hot water. The water will turn brown immediately. Shake the filter to rinse it for about 10 sec, then rinse with cold water until it run clear. Submerse the filter with clean cold water and store it (outside if you use frequent, in the fridge for longer term storage).
5. Pour the coffee out and rinse the lower globe both inside and out. After some usage, a brown stop might appear near the very bottom. This is most likely dried coffee.
Soaking it in cafiza once in a while takes that right off.
6. Wash your paddle and clean your towel.
Parameters for various methods:
Grind setting:
1. Super Jolly = 24~26 small notches coarser than espresso grind
2. Rocky = 27~30 from true "0" (burrs touching) fineness should be similar to table salt.
Directions for TCA-2/3:
Dark Roast (> Full City):
Temp = 89~90.5C
Dose = 20~30g (28 recommended, decrease if you have a lot of trouble stirring)
Light Roast (< Full City):
Temp = 90.5~92C
Dose = 24~32g (32 recommended)
1st stir = right after drop
2nd stir = @ 30sec
3rd stir = @ 55sec
note 1: temp is measured at the bottom, away from the center of the syphon top.
note 2: keep the stir under 5 seconds. Stir to fully saturate the grinds but not creating a vortex. A zig-zag/cross pattern works well.
note 3: kill the flame right before the 3rd/final stir. The top won't drop down
on you for another couple seconds.
Method II (aroma enhancement):
Roast: City+
Dose: 32g
Temp: 91C
- Same as method 1 but SKIP the 2nd stir @ 30sec.
- Keep the stir under 3 sec if possible
Method II will have thinner extraction compared to method I but preserves aroma.
Works wonders for a certain roast style/bean but under extracts most coffee. Use w/ caution.
Definition for full city is right before 2nd crack to 10 sec into 2nd. City+ is 30~60 sec after 1st ends.
And that is it. I think that is about as detail as I can give without step-by-step photos. Feel free to email with any more questions.
Tips:
- A Zojirushi hot water pot is a great companion to the Syphon (and any manual coffee methods).
- The timer a thermometer probe similar to what was used in the video is great with vacpot (and any manual coffee methods).
For brewing with a Hario TCA-2
Before you start:
1. Rinse your filter in hot water and wash with cold water until it runs clear.
If this is a new filter, run through the brewing once without coffee to get rid of the cloth smell.
2. Rinse your Syphon to make sure it's clean. Check for cracks, Dry all exterior and make sure the lower globe is secured.
3. Hook the filter to the top. Make sure it's centered.
4. Pre-boil water in kettle and prepare a cold, damp towel.
5. Place ~35g of beans in the grinder. Run a little bit through to clean up previous grinds.
Heat-up:
1. Fill hot water to the "2" mark on the side of the lower globe. These are little number inside a cup logo near the "hario" mark. (this works both for TCA-2 and TCA-3).
2. Insert upper chamber at an angle into the lower globe. DO NOT seal the top.
Make sure there is a gap for steam to escape.
3. Start your burner and place it in the center of the globe. Set it at max to speed up the heating.
4. Grind the bean into a container/cup. Scoop from the top, 32g of coffee into another cup. I recommend using the cupping cups. They are of nice size. Try to finish this step as close to "drop" as possible, but you can grind/weight before step 1 to avoid messing up.
5. Watch the water in the lower globe start to boil. At the sign of boiling (rapid bubble formation), straighten the top and lightly seat it. Do not "push/seal" the top hard. A very gentle downward pressure is enough. Make sure the top is center and straight.
6. Place the thermometer probe on top, near the bottom of the chamber, away from the center.
Adjust the burner to as low as you can without water falling from the top globe.
7. Watch the temp on top stabilize. There should only be very tiny bubbles and no turbulence. If you have leakage from the side, shift the filter with the stirring paddle until it's sealed. If you cannot get rid of that, start over and re-adjust the filter.
9. If your stabilized temperature is less than 91C, replace the top and increase the heat until it increase to 91C. If the temperature is more than 91C, stir the water on the top w/ your paddle rigorously until it decrease to 91C. (note: 91C is your target brewing temperature. Adjust per degree or roast... see further notes at the end).
10. Get your stirring paddle, coffee, and timer ready to go.
Drop:
1. When water temp stabilizes to 91C, take out the thermometer probe.
2. Hold the coffee on your left hand and stirring paddle on your right.
3. Dump the coffee into the top chamber and immediately start the timer with your pinky finger.
Start your stirring immediately.
1st stir:
Below is my personal technique. You can do whatever you want. Just make sure you do not create any vortex, saturate the coffee completely, and finish your move in 5 sec. The faster the better.
Longer/vortex stir will result in bitterness in the cup...
1. Holding the paddle like a pen with the flat section parallel to the "x-axis" (left-n-right).
Starting on the left most of the "circle", stick the paddle into the coffee.
Move the paddle in a "N" motion (up, down, up) toward the right. You should be able to do 4 "stokes" in about a second.
2. Repeat the motion along the "y-axis" if you felt more agitation is needed.
3.Start from the very top (+Y), "scrape" the side of the top clock-wise 180 degrees.
Repeat the motion counter clock-wise.
If you did the stirring correctly, you should have something like this:
If you do not see the pale "crema" on top, that means your grinds are not fully saturated. Don't be afraid to REALLY stir up the grinds (as long as you don't create a vortex/whirlpool).
Stirring is the hardest part of the whole thing. Takes some practice to get use to. Whatever you do, make sure everything is well mixed, no vortex is created, and do it in 5 seconds.
An Aeropress paddle works REALLY well for stirring ;-)
*Tip about stirring: a lazy rhythmic motion actually works better than fast and violent motion.
Basically you are creating "waves" that crash into each other, mixing the top and bottom layer of the coffee.
2nd Stir:
When the timer hits 30 seconds, do a second stir. Sometimes when the coffee are fresh, it will be really sticky and you will felt like you aren't stirring at all. Make sure you DO stir it well like your first stir. You should see mostly black layers of coffee when you are done.
3rd Stir:
1. At 55 sec mark, turn off the heat and remove the burner from the lower chamber. Stir immediately. When done properly, you should only have a top layer of light-colored coffee of no more than 1/4" (~6 mm) thick. (Note: After your stir, pay attention to how much coffee remained on the top. The thicker the layer is, the less of extraction it got. Work on your stirring if it's the case.)
Draw down:
1. Immediately after 3nd stir, wrap the cold, damp towel on the upper left side of the lower globe near the "neck" (right side is where the handle is). Make sure the wet towel does not touch the lower portion of the bottom globe where the flamed touched.
2. The draw-down should be around 30~50 seconds. Darker roast and higher dose will increase the draw-down time. Longer drawn-down results in continued/over-extraction and will cause bitters in the cup.
Clean up:
1. When the draw-down is complete, wrap the towel with your left hand around the neck of the vacpot (the metal ring); holding the top with your right near the top rim, gently rock the top back and forth until it comes loose. Careful it's a bit hot.
2. Holding the top with your left hand, gently tap the rim downwards with your right to loosen the grinds. Dump the spent coffee and rinse with water.
3. Release the hook and take out the filter. Wash both top and the filter as clean as you can.
4. Place the filter in a small cup of hot water. The water will turn brown immediately. Shake the filter to rinse it for about 10 sec, then rinse with cold water until it run clear. Submerse the filter with clean cold water and store it (outside if you use frequent, in the fridge for longer term storage).
5. Pour the coffee out and rinse the lower globe both inside and out. After some usage, a brown stop might appear near the very bottom. This is most likely dried coffee.
Soaking it in cafiza once in a while takes that right off.
6. Wash your paddle and clean your towel.
Parameters for various methods:
Grind setting:
1. Super Jolly = 24~26 small notches coarser than espresso grind
2. Rocky = 27~30 from true "0" (burrs touching) fineness should be similar to table salt.
Directions for TCA-2/3:
Dark Roast (> Full City):
Temp = 89~90.5C
Dose = 20~30g (28 recommended, decrease if you have a lot of trouble stirring)
Light Roast (< Full City):
Temp = 90.5~92C
Dose = 24~32g (32 recommended)
1st stir = right after drop
2nd stir = @ 30sec
3rd stir = @ 55sec
note 1: temp is measured at the bottom, away from the center of the syphon top.
note 2: keep the stir under 5 seconds. Stir to fully saturate the grinds but not creating a vortex. A zig-zag/cross pattern works well.
note 3: kill the flame right before the 3rd/final stir. The top won't drop down
on you for another couple seconds.
Method II (aroma enhancement):
Roast: City+
Dose: 32g
Temp: 91C
- Same as method 1 but SKIP the 2nd stir @ 30sec.
- Keep the stir under 3 sec if possible
Method II will have thinner extraction compared to method I but preserves aroma.
Works wonders for a certain roast style/bean but under extracts most coffee. Use w/ caution.
Definition for full city is right before 2nd crack to 10 sec into 2nd. City+ is 30~60 sec after 1st ends.
And that is it. I think that is about as detail as I can give without step-by-step photos. Feel free to email with any more questions.
Tips:
- A Zojirushi hot water pot is a great companion to the Syphon (and any manual coffee methods).
- The timer a thermometer probe similar to what was used in the video is great with vacpot (and any manual coffee methods).
Wednesday, September 10, 2008
barismo: Upcoming events

Based on the requests by those who missed out on a visit at the open house, we will split up and do a few follow up events so everyone can have a chance to have the same experience. Repeats welcome, new faces appreciated.
Other upcoming chances to sample coffees:
A Syphon demo at the shop hosted by Ben Chen.
Saturday Sept. 13th from 2-4pm
A few rounds of cupping hosted by Ben Kaminsky.
Thursday Sept. 18th from 6-8pm
A round of different style espressos presented by Chris van Schyndel.
Saturday Sept. 20th From 2-4pm
No RSVP, free to the public.
[where: 169 Mass Ave Arlington, MA 02474]
Monday, March 31, 2008
To the next 'golden' brew

Right now, there is a lot of navel gazing going on in the blogs about what brew methods are best, what to do now that the clamour for Clover turned into the planet buster on the death star....
A lot of people are talking about moving to the manual methods or anything new that's less automated. Siphon, pourover bars, and getting back to basics are becoming the buzz words. I think it's just a movement in trying to find a new niche, the new amazing brewer that will give them the angle. Specializing and definite product differentiation from the big boys. I am proud there are some serious cats out there brewing vac with all the tedium and technical precision of a guitarist mid solo but they are the few among a mob of new found fans of the manual method.
The times are changing and nothing is settled right now. There are no firm standards and we have no clear direction where things will be in the next year. It was not too long ago that I believe we were in the dark ages of coffee on the verge of change. Sure the forums were buzzing and 3wavers were aplenty working for 'the goal', but it was a time with a lot of passion and very little substance. Vac sealing was something only eccentrics did and few would publicly admit how much coffees deteriorate much less think about freezing a coffee.
The focus was on the equipment mods, ritual movements in preparation, and all about these name brand 'black box' blends. The forums were left to the machinations of latte artists proclaiming the value of triple rosettas and pacman blowing flames in your cup AND gratuitous photo series of 'naked' portafilter triple thick one ounce muddy baked 'chocolate' shots. Sure, there was an interesting segment focused on how to hack some cheapy piece of equipment into some better cheapy piece of equipment.... but eventually, you PID your PID and it becomes redundant so you end up buying the best equipment after spending lots of cash on a series of small modded upgrades.
Somewhere along the way, a lot of focus on the actual coffees was lost. Sure, I realize everyone is 'about letting the coffee speak for itself' and other catchy phrases but a little less time on forums talking about the concept and more time living it would help us all.
It's all the more complicated these days by marketing that is geared at direct trade and relationships where the farmer as a brand is glorified on one hand and on the other often then repackaged in mill marks where the farmer disappears again. Transparency is a funny thing we all talk about but don't really ever see or have the access to understand.
Then there are coffees where the placement in contests or prices paid set notoriety and it can simply be a contest to pay the highest price for the right to pay the highest price AND then you have press and buzz based on expensive brewing equipment and 20K utterly superfluous heating elements clouding the picture of what is really good coffee and what is just an expensive lamp making cheap coffee at a high price.
So, if you can clear through the fair trade, organic trade, direct trade, bidding wars, ego trips, pricey brewers, complicated techniques, barista flair, and well, everything but cup taste to well... simply cup taste, that's an amazing moment of clarity.
Things haven't really changed that much but I am thoroughly excited by splintering segments of the industry headed in new directions. The point is, there are great things going on in coffee BUT you have to dig deep and often the people doing the most amazing bits don't spend time cruising coffeed or CG, they are out there doing it. Marketing rarely cuts through to the tiny elements that can help make or break a good coffee.
Thursday, August 02, 2007
The Syphon Bar
Seems everyone is doing vac pot these days or at least giving it lip service. Getting a first read on a signed edition of a fantastic and thoughtfully written new coffee book (to be shortly reviewed) brought one thought though.
We don't know vac pot in North America. In fact, we largely have forgotten or overlooked most of the manual brew methods with the exception of the largely inferior french press method. Someone offered this thought to us recently and I dare say it has some truth, 'If you don't know your manual methods, what understanding do your really have of your automated ones?'
Scary thought that knowing a better hand pour method translates to a better drip brew.
 Our own jump into vac pot (syphon) and our exploration of hand pour methods came thanks to a Taiwanese contact who helped us along with inputs and pointers on how to brew his coffees.
It led to a thought, 'let's do vac pot in the shop.'
Oh yeah, many other people have had the same thought. That thought began to morph and fade as we realized it wasn't quite as simple as throwing a bar together and offering it up. How do you keep it constant and consistent? how do you charge people given the amount of coffee and prep needed? How do you keep your staff well trained enough to prepare it correctly for each and every different coffee?
The roast. You would have to roast for vac pot and make sure the brew parameters were largely fixed so your barista would only make slight adjustments. Fix your brew parameters and alter your roast profile to fit. Strange concept but darned if we hadn't heard the same thought before from our Taiwanese friend.
 So here's a bit of advice before anyone goes out and buys a case of vac pots and a halogen setup, learn more about it. The Japanese are having true culinary competitions while we still noodle around with it not quite understanding the physics. It may be the hip thing to do vac pot but a little research and thought may be in order before burning yourself and your customers with a bad brew.
Vac pot has a lot of potential to bring out amazing origin flavors but it's much more technical than many of us realize. The old light it up and steam the coffee to death method just won't cut it compared to a precisely technical approach, so get to learning about your manual methods and your more automated ones will improve also.
Tuesday, May 29, 2007
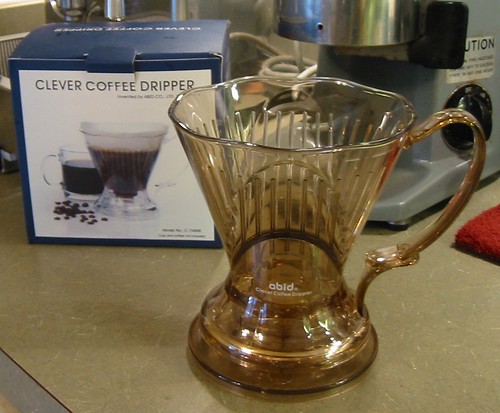
Abid "clever" coffee dripper
Other than vacpot (aka syphon), hand pour is another very popular coffee preparation method in Asia. In fact, it is the preferred method for non-espresso brewing method in Japan.
I've been wanting to try out this method for quite some time as I was told it made a different cup profile than vacpot. However, I never follow thru as I am intimidated by the various methodology and tools it required. I was also told it is a very technique-dependant method and can be quite inconsistent from operator to operator.
I first notice this little coffee gadget from mojocoffee's website. I was intrigued by its simplicity and promised ease of use. It's basically a pour-over cone with a stopper valve - you get the cleanness of the drip cone with full extraction of a french press. Best of all, it is stupid simple to use, very consistent, and takes less than 2 min from brewing to clean-up.
I made a request with my brother who is currently vacationing in Taiwan, and couple weeks later I got the unit delivered to my door.
Upon opening, I was quite impressed with the packaging. The graphic design is very well done (no "AS SEEN ON TV" style packaging here). Coupled with the high quality plastic (medical grade imported from Japan), it really made the unit felt substantial.
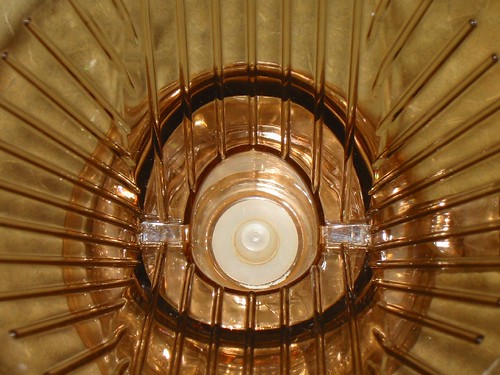
The design of the unit is very simple. It is basically a drip cone with a tiny plunger at the bottom of the unit. The plunger is connected to a plastic disk/ring. When the dripper is placed on its legs, the plunger will sealed the drip hole due to the weight of the plastic disk. When placed on top of a cup, the rim will push the disk up, lifting the plunger, and allow coffee to pass thru. The concept is so simple yet it worked so well.
The brewing procedure are as followed:
1. Place paper filter in the cone. If desired, run some hot water thru to "wash" away paper taste.
2. Add coffee to the dripper. I use 32g per a full dripper brew (~ 12oz, ending w/ ~ 8oz of coffee).
3. Add hot water (198~202F, depends on the coffee) to the dripper. Make sure the grinds are well agitated. Stir if necessary.
4. Wait 1 min. Stir to break-up the crust.
5. Place the dripper on top of cup and let it drain. The drip time is roughly 60~90 seconds depending on the grind fineness.
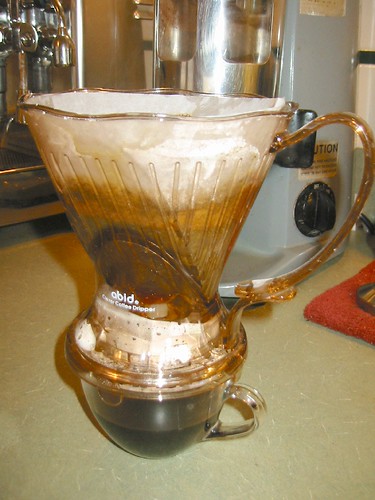
That is it. Clean up involved tossing away the paper filter and rinse the dripper. You get a cup that is aromatic, full flavored, and clean with a total dwell time of roughly 2 min (+ 60-90seconds of drain time).
"Clever" coffee dripper is clever indeed.
- Ben C.
Tuesday, March 06, 2007
AeroPress Revisited
Long time readers of the blog (if such things exist) might recalled that we've reviewed the famed AeroPress way back then.
Using it in the stock configuration and mimicking brewing parameters of a clover (time, temperature, grind dosage and coarseness), the aeropress produces a cup that is cleaner, yet inferior to a french press cup.
The problem has to do with uneven extraction due to seep thru that occurred as soon as you pour water thru the grinds. Using it in the inverted manner, the cup improves a bit as it allowed the coffee to extract more evenly at desirable temperature.
Despite improvements with the inverted method, the resulting cup is still inferior to a regular french press cup in both aroma and flavor; the stock paper filter, while capable of producing a very clean up, simply absorbed too much of the oil and aromatics.
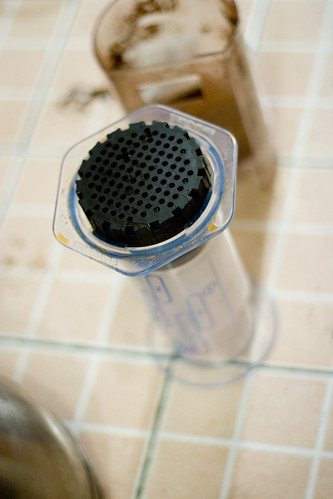
Photo Courtesy of Gabe Rodriguez
Several weeks passed and the buzz with AeroPress continued on CG. I noticed a new development with the inverted method. The stock paper filter is replaced with a polyester felt round that allows much of the aromatics and the oils to pass thru. A couple of email exchanges with Scott yielded a generous offer of samples of these poly-felt rounds for me to play with.
Following Scott's instructions, I was able to produce cups that retained the flavor and aroma, while being much cleaner than the french press. Using brewing parameters similar to a clover brew, the cup comes surprisingly close according to Jaime, and is sweeter than the french press cups. We concluded that, while being a bit clumsy and messy, this configuration (inverted + poly-felt) produces a satisfying cup that is good enough of a reason to keep this device in our array of coffee brewing apparatus.
However, after my recent visit to Taiwan, things changed a bit.
A vac pot is what I use, almost exclusively, for "brew coffee" now. The vac pot has all the advantages of my coffee brewing devices: near constant brewing temperatures, adjustable brew temperature and time, as well as a cake filtration that produces a very clean cup.
Upon learning the proper method and brewing parameters of the vac pot, I was able to produce cups that are the cleanest, most complex, and most aromatic among the three brewing methods. It also produces cups that have a long and lingering tail that stays in your mouth well after consumption. The brewing/clean-up is not much worse than the inverted poly-felt aeropress and it takes less than 5 min from grind to clean-up. The total cost of the setup is also comparable to the AeroPress.
Unfortunately, I am not aware of any US retailer selling the 2 cup version of the Hario Vac Pot. The larger vac pot units are not very desirable as you need to brew it at capacity in order to have a proper extraction. In fact, I had a 5 cup unit that I ended up gifting away due to that (there is no way in hell I can drink that much coffee without getting caffeine sickness).
Using it in the stock configuration and mimicking brewing parameters of a clover (time, temperature, grind dosage and coarseness), the aeropress produces a cup that is cleaner, yet inferior to a french press cup.
The problem has to do with uneven extraction due to seep thru that occurred as soon as you pour water thru the grinds. Using it in the inverted manner, the cup improves a bit as it allowed the coffee to extract more evenly at desirable temperature.
Despite improvements with the inverted method, the resulting cup is still inferior to a regular french press cup in both aroma and flavor; the stock paper filter, while capable of producing a very clean up, simply absorbed too much of the oil and aromatics.
Photo Courtesy of Gabe Rodriguez
Several weeks passed and the buzz with AeroPress continued on CG. I noticed a new development with the inverted method. The stock paper filter is replaced with a polyester felt round that allows much of the aromatics and the oils to pass thru. A couple of email exchanges with Scott yielded a generous offer of samples of these poly-felt rounds for me to play with.
Following Scott's instructions, I was able to produce cups that retained the flavor and aroma, while being much cleaner than the french press. Using brewing parameters similar to a clover brew, the cup comes surprisingly close according to Jaime, and is sweeter than the french press cups. We concluded that, while being a bit clumsy and messy, this configuration (inverted + poly-felt) produces a satisfying cup that is good enough of a reason to keep this device in our array of coffee brewing apparatus.
However, after my recent visit to Taiwan, things changed a bit.
A vac pot is what I use, almost exclusively, for "brew coffee" now. The vac pot has all the advantages of my coffee brewing devices: near constant brewing temperatures, adjustable brew temperature and time, as well as a cake filtration that produces a very clean cup.
Upon learning the proper method and brewing parameters of the vac pot, I was able to produce cups that are the cleanest, most complex, and most aromatic among the three brewing methods. It also produces cups that have a long and lingering tail that stays in your mouth well after consumption. The brewing/clean-up is not much worse than the inverted poly-felt aeropress and it takes less than 5 min from grind to clean-up. The total cost of the setup is also comparable to the AeroPress.
Unfortunately, I am not aware of any US retailer selling the 2 cup version of the Hario Vac Pot. The larger vac pot units are not very desirable as you need to brew it at capacity in order to have a proper extraction. In fact, I had a 5 cup unit that I ended up gifting away due to that (there is no way in hell I can drink that much coffee without getting caffeine sickness).
Subscribe to:
Comments (Atom)