We were playing with some Chemex brews the last few days. Trying to get a bit more out of this brewer as it has become a go to method for a lot of people in the coffee scene outside of our region but initial observations tell us it isn't giving as good a cup as I would like. There are obviously varying degrees of acceptance among our group but I have not been impressed yet with a mix of techniques off that device. It seems to hide a lot of roast note and under develop without getting as nice an aroma as our other more familiar brewers. This could be because we haven't spent enough time with the method but we also had some other observations that made us think this brewer isn't necessarily our style. Given the comparable day to day methods we use for drinking our own cups: Abid full immersion brewer (which is heavier in body but mutes acidity), the v60 style cone pour overs (better aromatics), as well as the cloth pour overs (the best of both worlds when done well but it's hard to do well).
First thoughts in our group were that it has to do with the angles of the smaller Chemex we had. After a round of discussion though, it seems more simple. Ridges.
The method we really enjoy comes from techniques combined between this and this. Where a Chemex brews down through the layers, a v60 style brew has raised ridges that provide space for drainage on the sides, not just out the bottom. This means you have to be a little more detailed in how you pour because you can easily under extract by breaking the ring but it results in a better balanced cup. The tastes come out with more aroma and more nuance in the cloth method particlarly.
The hand made cone here is noteworthy because it is akin to Ben K.'s favorite pour over device, the cloth dripper. It's really simple actually, you pour in a circular motion into the center and the coffee and it extracts evenly through the cake which forms a V if done correctly. Be careful not to break the bloom and it will hold temp better and be more aromatic. Some arm chair quarterbacks have proffered that the open ventilation would somehow cool the brew but I would suggest unless you have brewed it with a temp probe and experienced the resulting cup(we have), it's better to test it than hypothesize. I will post a primer when things settle down but right now we are too busy to do it proper.
This methodical hand pour method is one where you have to really pay attention and it's a contrast to the method I keep seeing of pre-infuse and then fill which is no different really than most approaches to Melitta. I am not sure the kettle is as important to that method but it really does make a difference for that slow controlled pour you need on a v60. It represents a bit more work but the reward is in the cup. Check out this Hario promotional video for a few chuckles and a look at the dripper and v60 in action. We have a case of the nice ceramic v60's coming in to play with soon so keep an eye on the shop for an upcoming demo session.

Showing posts with label abid coffee dripper. Show all posts
Showing posts with label abid coffee dripper. Show all posts
Sunday, February 01, 2009
Tuesday, May 29, 2007
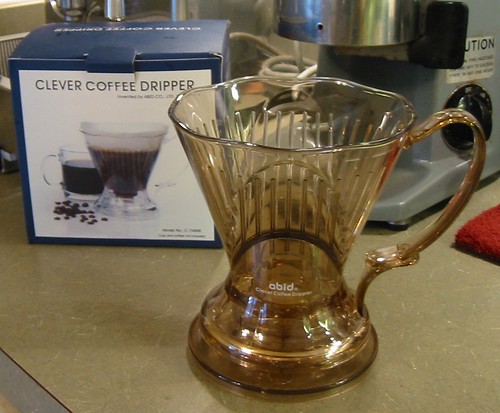
Abid "clever" coffee dripper
Other than vacpot (aka syphon), hand pour is another very popular coffee preparation method in Asia. In fact, it is the preferred method for non-espresso brewing method in Japan.
I've been wanting to try out this method for quite some time as I was told it made a different cup profile than vacpot. However, I never follow thru as I am intimidated by the various methodology and tools it required. I was also told it is a very technique-dependant method and can be quite inconsistent from operator to operator.
I first notice this little coffee gadget from mojocoffee's website. I was intrigued by its simplicity and promised ease of use. It's basically a pour-over cone with a stopper valve - you get the cleanness of the drip cone with full extraction of a french press. Best of all, it is stupid simple to use, very consistent, and takes less than 2 min from brewing to clean-up.
I made a request with my brother who is currently vacationing in Taiwan, and couple weeks later I got the unit delivered to my door.
Upon opening, I was quite impressed with the packaging. The graphic design is very well done (no "AS SEEN ON TV" style packaging here). Coupled with the high quality plastic (medical grade imported from Japan), it really made the unit felt substantial.
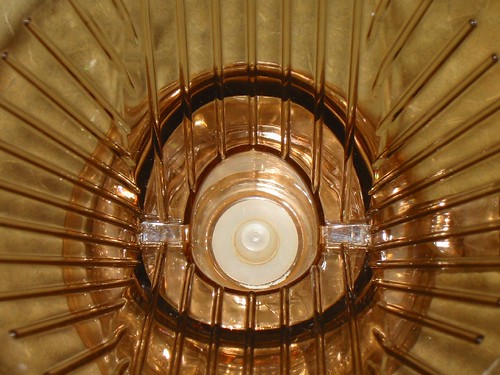
The design of the unit is very simple. It is basically a drip cone with a tiny plunger at the bottom of the unit. The plunger is connected to a plastic disk/ring. When the dripper is placed on its legs, the plunger will sealed the drip hole due to the weight of the plastic disk. When placed on top of a cup, the rim will push the disk up, lifting the plunger, and allow coffee to pass thru. The concept is so simple yet it worked so well.
The brewing procedure are as followed:
1. Place paper filter in the cone. If desired, run some hot water thru to "wash" away paper taste.
2. Add coffee to the dripper. I use 32g per a full dripper brew (~ 12oz, ending w/ ~ 8oz of coffee).
3. Add hot water (198~202F, depends on the coffee) to the dripper. Make sure the grinds are well agitated. Stir if necessary.
4. Wait 1 min. Stir to break-up the crust.
5. Place the dripper on top of cup and let it drain. The drip time is roughly 60~90 seconds depending on the grind fineness.
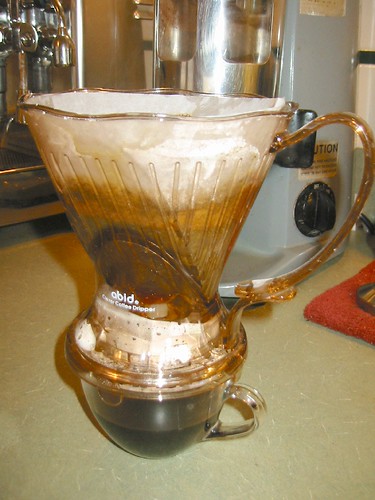
That is it. Clean up involved tossing away the paper filter and rinse the dripper. You get a cup that is aromatic, full flavored, and clean with a total dwell time of roughly 2 min (+ 60-90seconds of drain time).
"Clever" coffee dripper is clever indeed.
- Ben C.
Subscribe to:
Comments (Atom)