company - education - coffee
Showing posts with label v60. Show all posts

Monday, December 05, 2011

Pour over cheat sheet

Here’s a quick cheat sheet to help you get the most out of your home Hario V60 and Buono kettle set-up.

Before you pour:

1) Temperature: After your water is done heating, make sure it is the correct temperature. All of our coffees have a recommended brewing temperature on the bottom left side of the front label.

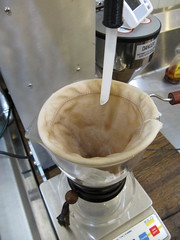
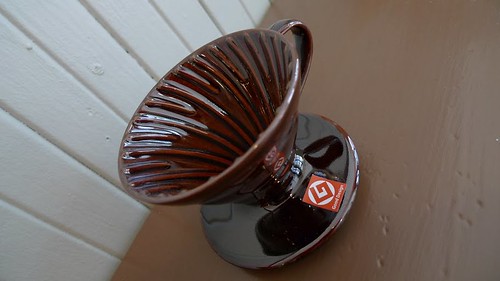
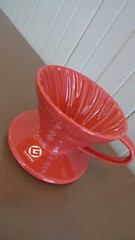
2) Rinse: It’s important to rinse the filter. Doing so helps to get rid of unwanted paper-y tastes and also helps ‘stick’ the filter evenly inside of the V60 Dripper. This also pre-heats your v60 and Linkrange server (or cup). You can do this with the water while it’s cooling down to the ideal brewing temperature. Just don’t forget to toss the water before you brew!

3) Fresh: Grinding fresh should be the last step prior to actual brewing. This and a fresh roast can ensure the freshest cup of coffee possible.
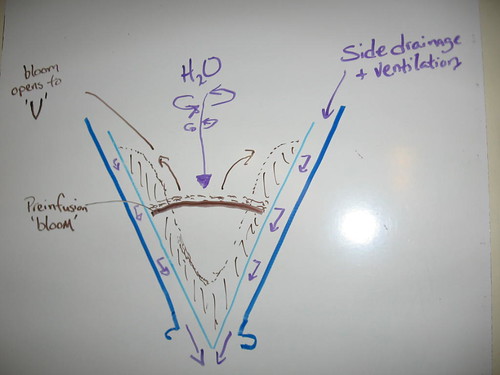
v60-Side view Pre-Infusion:

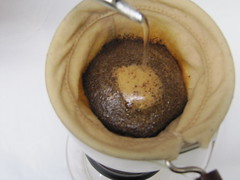
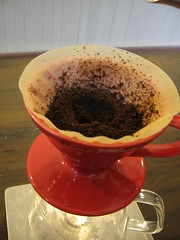
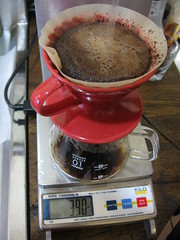
Place the coffee in the filter and make a small divot in the center of the grounds. Start from the center of the bed of coffee and, in a spiral, work your way to the outside of the V60. At this point, you only want to evenly wet the grounds. Start your timer, and wait 15-20 seconds (or until the bloom stops bubbling and settles). You should see the coffee begin to expand, or bloom, and then settle slightly during this phase.
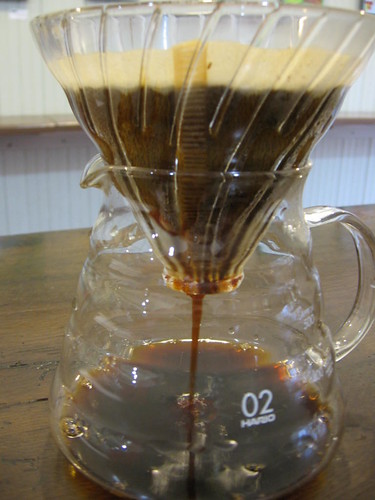
Brewing:

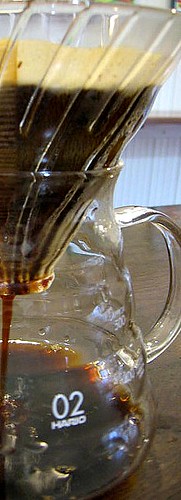
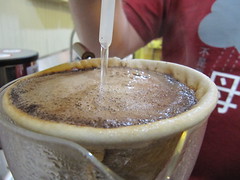
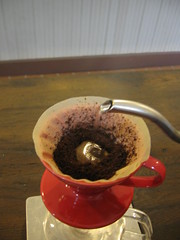
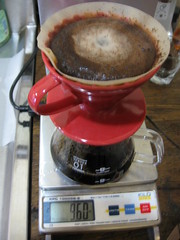
After the coffee has bloomed, start pouring again from the center of the coffee. Work the stream of water in a spiral evenly toward the outside of the V60. Be careful not to touch the outermost edges of the coffee bed with water. This prevents water from running directly down the side of the V60 without passing through the coffee. Continue to pour evenly spiraling in and out until you have reached the recommended yield (end brew volume) for your V60.

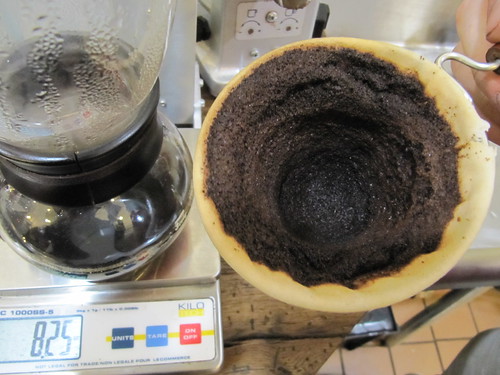
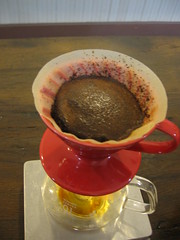
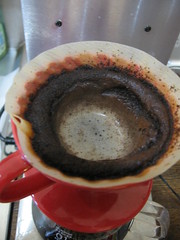
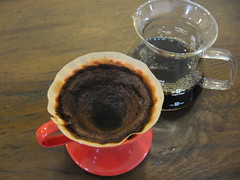
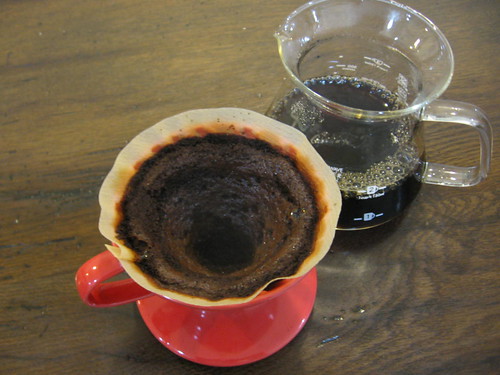
After you have finished brewing, the bed of coffee should look concave as opposed to flat. This is a sign that the coffee was evenly extracted.

Other tips and recommendations:

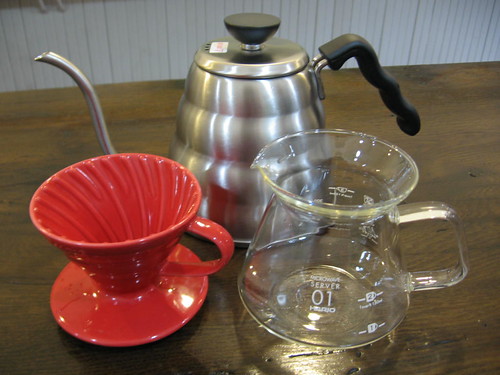
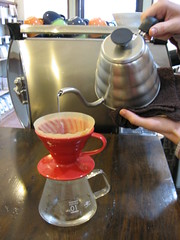
1) When you are pouring, the water should look like it’s falling from the kettle, almost like a tail. An aggressive pour can result in channeling, and improper extraction. You can place your free hand at the top of the kettle to help control the flow rate. A kettle gicluer helps to control the flow rate even further and is a highly recommended addition to your V60 set-up.

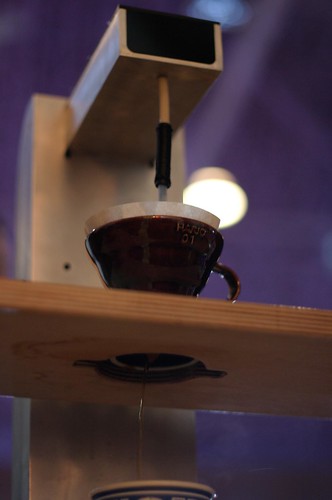
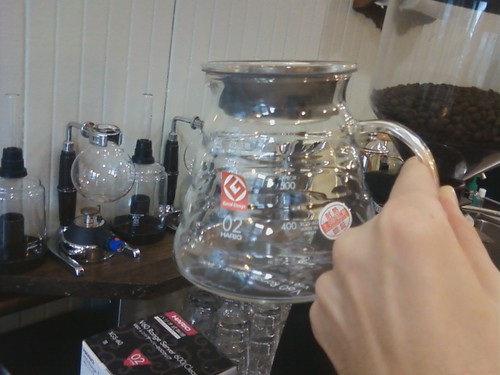
2) If the time for the water to drain from the grounds and enter the range server after your final pour takes longer than 30 seconds, your coffee might be ground too finely. If the water drains through the bed of coffee quickly after the final pour, your flow rate might be too fast and the grind too coarse.

3) A 1 cup v60 takes 2-3 minutes for a brew while a 3 cup takes 3-4 minutes. See our brew guides in our shopping section.
---

The V60 system is one of the most clean and satisfying brew methods around, but it can take many tries to really get it down. As long as you are using the correct temperatures and dose, maintaining an even flow, and distributing the water correctly, in no time you will be making pour-overs that rival some of the finest coffee-bars around. - Steve J.

Wednesday, December 08, 2010

A little information about potential pour over filters

There are three basic kinds of filter medium wide spread in use in the industry we would like to talk about: Paper, metal, and cloth.

Paper as a filter medium: Everyone always says paper wicks away oils and flavors. What you need to know is that rinsing paper filters help but many paper filters are just going to taste like paper. To really understand this, you need to stop drinking coffees with paper filters for a while and then come back to it. The contrast really makes it clear.
The other thing you need to know is that fines will build up against the walls of the filter (subject to the shape of the filter). Cumulatively, we describe the tastes from paper as thin, brighter, and crisp. Look for paper filters that are less thick and avoid brown filters.

Metal as a filter medium: Metal mediums (much like glass) depend highly on the hole sizes (and their spacing). Amounts of fine particulate are expected to pass through to the resulting cup. The effects in taste notes are simple, regardless of what form factor. This filtration that lets sediment through will have more body, more texture, less clarity, and can result in an over extracted harsh taste in the cool cup (from sediment). The fine particulate should be avoided and compensated for in methodology as much as possible.

Cloth as a filter medium: Cloth is unique and a bit unorthodox these days. It is the only filter medium in common use that has natural depth filtration. The fines will be trapped effectively and oils will pass through resulting in a heavier cup with great clarity. Cloth is hard to care for and can easily impart off flavor notes if not rinsed properly after use, cared for in between uses, and cleaned properly as needed. It also requires a seasoning brew the first time it will be used! That's a lot of work so we often recommend cloth for the diligent or advanced user.

Sidebar: Surface Filtration vs Depth Filtration + Cake Filtration
Surface filtration is where the filter medium keeps all particles, that do not pass through at the surface of the filter, on the surface. Depth filtration allows for particulate to pass through the surface layer and into the depth or layers of the medium. This means that the finest particulate is less likely to build up in a layer on the surface and is captured in that depth.

Cake filtration happens in the brew cake of a pour over (espresso pucks as well). As the grinds settle in a brew cake, the layers of grounds act themselves as a filter. This extra bit of filtration is dependent on two things: depth and agitation. Two good examples of cake filtration are the narrow top chamber of a Syphon and the shallow wide brew puck in a Clover brewer. Unlike a Syphon, the brew chamber design in a Clover has a shallow puck with very little cake filtration. (However, by whisking or strong late agitation, a brew cake will not form and have little to no effect on filtering the resulting brew of a Syphon).

This is why we push for less circular stirring agitation in Abids/Syphons/Clover, less pours around the edge of the brew cake in hand pour, and less aggressive pouring (lower steady flows are better). To achieve more clarity and layers of flavor in the resulting cup, a focus on achieving cake filtration seems essential.

We recommend paper if rinsed well for the every day user, cloth for the advanced or technical focused, metal filters for those who are looking for most ease of use. Cloth is our favorite in shop as it works extremely well for the volume we have. Some time ago while in Japan, I played around with and got a Cafeor (a metal screen filter v60) from Hario which is similar to the K-One (has larger holes spaced differently). We found that it worked reasonably well with it's screen configuration where the screen was only about 60% of the surface area but the sediment was still a problem. We adjusted our method quite a bit to compensate for the sediment and found a coarser grind, longer pre-infusion bloom, and dumping the first drops during pre-infusion helped. The sediment though proved for a often unpleasant cool cup and we much preferred the results we get in Syphon and Cloth hand pours.

Aside from the Cafeor, our trainer and an engineering friend played with the new K-One. Neither liked the results and were caught off guard by the enthusiasm others had when tasting the same cup. Regardless, we are going to play in shop with one tomorrow care of Dylan Evans who is gonna bring it in to give it a full working over. I believe our experiences with the Cafeor will hold true. We've tested everything and choose to stick with the methods we like the most regardless of how difficult or complex they get as long as we can find a way to execute consistently with them on bar.

In the end, choice of filter medium is really about a match of personal taste, patience for details, and ease of use. Try them all and work until you find what you like.

Saturday, July 17, 2010

v60 and free pour

One of the key tenets of a quality per cup is repeatability. A big reason we teach our method is because it is highly repeatably with the correct tools and an attention to detail.

What we have found though is that having a few extra tools helps. For the Hario Buono kettles, a flow restrictor can be very useful in getting a steady and consistent pour volume over a fixed period of time. I often find myself cringing at the aggressive pours I see from some other industry people which begs the question, why are they even using a kettle if they are going to pour it in there like that?

On the other end of the spectrum is the new Lb-1 which should come out in the fall. We have been playing in shop with it's dynamic temperature adjustments but also, having the flow controls is an exceptional benefit. Being able to dial in the exact ounces per minute to get the flow rate we want for each brew method and then directing the water where we want it is a tool many would love to have. It makes for a very repeatable brew by guaranteeing the same volume of water always flows through as long as the timing is the same.

That's something lacking from a lot of manual methodologies like consistent volumes of water, not to even get into how few people are focusing on temperature control.

Sunday, February 07, 2010

Classes and updated brew guides

Classes are online for signup. Class size will be limited so sign up before they fill.

We will also be updating our list of brew guides and expanding our education section to include video materials and illustrated guides. Keep an eye on it or bookmark it as it grows.

1 cup cloth woodneck

Sunday, January 31, 2010

The difficulties of per cup

Articulated Water Delivery System: Simply put, the manual version of this concept is the hand pour kettle. Unlike a simple hot water boiling kettle, this version is designed with flow rate control in mind and the end user has an approximate but not precise control over the temperature. AWDS implies pouring where you want it at a flow rate you are trying to control. This is an important concept to think about when considering the usefulness and value of having control over flow. For the kettle though, this is an art form that takes an exceptionally long time to master. The difficult learning curve of balancing a kettle to get optimal flow presents a problem all it's own.

We can easily find other problems with nearly every option available for hot water delivery. They are inefficient, time consuming, and often impractical. So, let's take a moment to evaluate our options.

Table top boilers dispense water but you need to transfer that water to another container or bring the brew device to the water source. These boilers range from a large water tower down to a simple Zojirushi water boiler. These are always on and run continuously, tend to be very energy inefficient and the water is often stale.

Small hot water kettles are typically electric and boil water on demand. The main problems being that they need to have time to get up to boil and cannot handle any significant volume with speed. While fine for home use, they become increasingly impractical in cafe settings where any real volume is present.

The standalone brewer would be the so called 'per cup concept' that requires either a new brew method adoption or for the user to work with an entirely revised set of brew physics. The goal is often a tweaking of variables to attempt a quicker 'per cup.' This self contained brewer uses some new fancy way of brewing to set itself aside by trying to 'reinvent the wheel.' This kind of design concept is not only often expensive, it can easily have many flaws in design that may not show up until many users are out there testing it in real world scenarios well into sales and production. The real problem being that cup quality was often secondary to speed to balance the third item, cost.

So we acknowledge the problems and the question is, what's the solution?

We have an answer to that.

An AWDS that uses technology to provide flow controls and temperature controls would meet the need. It would not be a brewer by itself. Instead, it would provide hot water at precision controlled temperatures and adjustable flow rates through an articulated 'wand'. This would theoretically be the hot water delivery system that worked with all brew methods that could benefit from precision water temperatures and adjustable flow rate controls. All existing and widely used hand pour and general pour over methods would benefit from this system.

Instead of trying to create a new standalone brew system with new brew physics, a group of engineers have spent the last two years developing a hot water delivery system that functions as an AWDS. After an initial goal of stable temperatures and fixed flow rates, they have now tuned the device to respond to temperature and flow rate changes. That is unprecedented and as yet a largely unexplored avenue of brewing coffee outside of a few lab situations.

This would be an exteremly useful item for chemex lovers and melitta fans, but the real novel application seems to be when you tie in a product invented in 2006, the v60, it gets exciting. The v60 is designed in such a way that the flow rate of the water has an effect on the cup profile of the brew and adds another point of control. When used incorrectly or carelessly, it's a detriment to the resulting taste which creates a bit of a learning curve. The benefit of this control is that tied to a water delivery system with an articulated spout, dynamic temperature control, and adjustable flow rates, you have every variable in pour over brewing under control. Using technology to assist in brewing with an already familiar method speeds up the process to the point that brewing per cup now becomes very attainable in most cafe settings. Instead of reinventing the wheel, they came up with a design that works with all wheels making them more finely tuned and faster.

Resulting grinds from woodneck

Brilliant and yet simple in it's vision. I am lucky to continue to be a beta tester and have input on this project while this concept goes into production and heads towards market. Lex and I are code naming this 'The Hippocrene Project' but you can find out more in the next few weeks on the Luminaire Bravo 1 water delivery system via: http://luminairecoffee.com/

Saturday, January 30, 2010

About this pour over thing

This is a scan from a Hario campaign piece for v60. We linked to it earlier but I felt like we needed to explain it a bit more after seeing Sweet Maria's video set on Pour Over Part 1, Part 2, Part 3.

The Hario Adv reads as follows:
Step 1: Pour freshly ground coffee, your choice, in the the dripper. Shake lightly to level.

Step 2: Pour hot water slowly, little by little, to moisten the grinds, starting at the center. Let drip 30 seconds.

Step 3: From the center, pour water in a circular motion, not letting it touch the paper filter. Brew the coffee for 3 minutes total.

Step 4: When the brew reaches the measurement line, remove the dripper.

The points to take away from this are simple. Prewet with just enough water to wet the grounds and let bloom for 30 seconds. Then pour in a deliberate and circular motion without pouring at the edges of the paper for a total time of 3 minutes. It can be compared to a little more technical and specific to our roast style version of the v60-02 in our brew guide section.

Pouring at the edges is the one that really gets me. Why do so many people think this is a good idea to wash the grinds away and allow water to flow out the sides of the filter (and not through the coffee)? Rhetorical question because the answer is, they are brewing it like a melitta or chemex.

The earlier mentioned videos are a good example of brewing the v60 like a Melitta and getting results that lead to criticism. The grind and pour rate are 'kinda important' and I think that was missed in a video review that will mislead a lot of home users. Seeing someone use an incorrect grind and then use a pour method that would only work with a pour over device that restricted flow is difficult to watch.

I wouldn't normally note something that looks more like a disguised sales pitch for Abids than honest exploration but there were vague references throughout the video and criticisms of v60, kettles, and references to 'some people' that seemed to be aimed at our methods or in the very least, those that agree with us.

I guess what irks me is not the talk but the continued criticism of hand pour by people who do not have a depth of knowledge or any real experience on the subject. It's as if hand pour with kettles and all the methods never existed and were not widely used in Taiwan and Japan for many years already but only came into existence with their recent growing popularity. I believe the language barrier accounts for a lot of that but there is also a certain arrogance that comes with many of the voices in our coffee community.

We all talk as barista about the old Italians that may come in every now and then to lament either the cup/espresso not being hot enough or the shot not being lungo, or simply unwilling to acknowledge anything that isn't old world Italian style as being good espresso. This resistance to hand pour methodology is the same thing as the bias these Italian espresso drinkers can carry for the old ways.

Failing to acknowledge there exists a library of kettles and per cup methodology well beyond those we are commonly exposed to with Hario and the knock off Bonmac brewers is our own shortsightedness and arrogance. The potential usefulness of these items is not explored unless we put the time and effort into them. The first step in that though is to explore their design and intended use, not to measure them unfairly by applying an incorrect methodology. Ignoring design when evaluating a product is a statement about the reviewer more than the product itself.

The more intriguing aspect is that I think we are on the verge of a coffee cultural shift toward full manual per cup and the old guard are fighting to have a say in it or simply attempt to voice some kind authority on the subject. If this is the case, as it has happened many times before in the last decade of our current coffee culture, it should be interesting to see which side takes the message to the bank.

Tuesday, January 26, 2010

Adjusting the grind

Our approach to espresso is the same as our approach to manual methods. It involves eliminating (by controlling or making fixed) the majority of variables. Our approach to espresso has been to work from a point of the ideal situations for time, temperature, volume, and dose backwards. Once we find the sweet spot in an espresso, it becomes a formula of adjusting the grind to account for environmental or outside factors.

So, we use our ideal settings for dose, time, and temp as rather fixed and then tune the grind to adjust volume as needed.

The same approach is taken with Syphon as it is with all hand pour methods we work with. Find an ideal set of parameters and work backwards. Determine an ideal temperature relative to dose, timing, and volume.

For our Syphon methods, grind is easy to adjust. Once you choose a dose, temp, and brew volume relative to a specific time. In this instance, we choose the draw down time as the coffee comes from the top to the bottom globe. We treat it as a fixed value which for our method, relative to our specific dose and time, which is 30 seconds. Change the brew time or dose significantly and this value of 30 seconds becomes a bit arbitrary, needing a recalibration.

For v60 and other free pour methods like the Cloth Flannel Woodneck, grind is not alone in affecting the brew volume. The pour rate has a large effect.

For beginners to v60, we recommend using a scale underneath to measure pour rates. Rather than using it for resulting brew volumes, we use it as a measure to know for certain we have (for example) poured 6 ounces in the first minute. Knowing the rate of pour is a good way to pin that down as a variable and then adjust the grind.

In the same way as we do the Syphon, we choose the last 30 seconds for draw down in the one cup method as a point for grind calibration. If we stop pouring at 30 seconds and the last drips flow through before the time is up, the grind is too coarse. If there is substantial water left, the grind is too fine.

This is, of course, subjective to dose and whether the pour itself created an even dispersion of grinds in the filter bed.

The summary being, we attempt to hold all variables firm to the only one that is most effective in compensating for environmental variables, the grind. The grind has an effect on flow and resulting brew volume so the key is constantly adjusting the brew volume back towards ideal throughout the day with a fixed dose, time, and temp.

Monday, January 25, 2010

A few notes on certain Hario products

Check out this commercial on v60:
.Here's some proof on the whole Skeleton (misprint Skerton) hand mill.

This one is from a scan of campaign materials that we thought was very informative. We are asking for a more detailed version.

It's a good example of the basic methodology a v60 needs. Prewet or pre-infusion, a spiral pour in the center, and using the range servers for measurements.

I think it's essential to keep reinforcing that the methodology is important. Dose and resulting volume can be specific to roast styles and certain coffees, but using the v60 like a Chemex or Melitta is a waste of it's superior design.

Tuesday, December 29, 2009

Hario 'woodneck' design and some thoughts on hand pour

The Hario woodneck is one of those brewers that is near and dear to my heart. It's not dissimilar to the v60 in it's benefits. Well, a v60 using the cloth filter, that is. The woodneck may look a bit like a Chemex but do not be deceived, there is nothing between them that is common beyond the carafe like shapes.

Woodneck spout
I have been rethinking how something as delicate and simple as the spout on the woodneck is created. The technical skill it takes to make something in this shape, consistently, with high quality glass, to exacting standards in quantity is an elegant piece of engineering. It's something we could easily miss in a North American coffee scene dominated by paper and plastics.

The problem is, we don't have a base for many of the manual coffee brewing methods. As we (re?)discover them, there seems to be an almost ridiculous assumption that we are the first person to ever brew with them. Seeing reviews written on these manual brew items by people using them for only a week or two reinforces this though not nearly as depressing as it is to read coffee pundits decrying the blasphemy of 'new' brew devices they seem to have little understanding of.

The v60 itself is actually one of the newer brew devices, only three years out of the Hario design labs but it's brew concepts are based on decades of experience in a culture that does a lot of hand pour (aka pour over) brewing.

I have experienced that a good kettle brew takes the same kind of investment and practice espresso does. That is to say, it is not something you pick up in a few brews and relies a lot more on repitition and user input than do most of the pour and fill methods we are used to. In the last two years of using woodneck and v60, I have come to appreciate them as much as Syphon. It was not until I had spent a year working with them in the shop and serving on them daily in the last half year that I really got to understand these items better and grasped the do's and don'ts in relation to our coffees using hand pour methods.

The woodneck specifically is elegant in it's own right but it is unique because it is a cloth hoop brewing device which are pretty rare in the US coffee culture right now. It requires the same skill set as we have discussed with v60 but produces a slightly different taste profile. Cloth is depth filtration and produces not only great clarity and oils, it gives a very layered and complex cup when done correctly. Take care of the cloth and rinse it well, use it often, clean it with coffee detergent as needed, and it will never 'taste like cloth'. Store it wet in a ziplock bag in the fridge but don't freeze it or dry it out. It will only 'taste like cloth' when it is either rinsed poorly, stored poorly, or allowed to dry out. A good boil in water is often enough to get the filter ready to brew again in short order. These are the facts as we use our cloth filters daily in shop.

So take a moment to enjoy a couple of videos on wood neck. One was forwarded to us from the folks at Hario and the other is a one cup ~6 ounce woodneck video by our own Chris. Catch him on bar in at the shop this Sunday or Fri.

'Jamie lynn will say OMG when she sees this.'


Quote Chris: '2 minute brew plus pre-infusion, 18 gram dose (of light roasted Kenya), 90.5c water temperature. Produces 5.5~6 ounces. Keeping an even small stream of water is very important for this short continuous pour.'

Sunday, December 20, 2009

Pour over videos from Taiwan/Japan

Here's a few collected videos of pour overs to give a broader view what is out there.

The following is a famous very old school Japanese roaster doing his pour over method on TV. His book on coffee roasting and brewing is interesting, techniques on double roasting, dark roasting, and the benefits of aging/aged coffees. About as far from barismo philosophy as you can get so you will understand we are not endorsing this method, it's just interesting to view. I personally think the bit at the end where the hosts get into the brewing is the most entertaining part.


Next up is Jet from Bella Taiwan doing a quick and easy continuous single 1 cup 2 minute brew. It's closer to methods we like to use at the moment on our own coffees for a 1 cup but the timing may be different. Of course, every coffee behaves differently and so do different roast styles so match it to personal taste.

After that is a demo of the stop and go method. We use variations of this for larger 2 and 3 cup brews. It involves pouring a little faster and relies on setting the grind well to control the drainage. I had been using this style for a one cup until I finally got comfortable with the continuous pour.

The last video is the type of method I understand Osir of Taiwan does. It involves a coarse grind, lots of volume, and a rapid continuous pour. This method seems more in line with the old school Japanese methods I have seen but it's not one we use.


So there are some basic pour over ideas to get people started.

Tuesday, November 24, 2009

How to: The v60 1 cup 9 ounce method

v60-1: 1 cup setup
1 cup Range server, 1 cup v60, and Kettle


You will need:
Kettle
v60 1 cup
*1 cup range server
v60 filter (paper or cloth)
A gram/ounce scale
Thermometer (preferably digital)
Coffee and Grinder
Filtered hot water


v60-2: Balancing the kettleThe following method is for a 9 ounce cup to approximate traditional US style drip coffees. With a slightly adjusted grind and slower speed of pour, a smaller resulting volume in the same amount of time can be brewed for more intense origin characters.

1. Rinse filters (cloth or paper) before each use with water off the boil. This will remove some unwanted tastes and warm the v60 itself. A rinse also helps hold the paper filters into place.

2. Use a cloth underneath the kettle when pouring for balance and to avoid burns. For best results with the Hario Kettle, a slight tilt on it's side can help control the slower pour speeds.


v60-4: Divet in groundsv60-5: Prewetv60-6 : Preinfusion bloom

3. After freshly grinding freshly roasted coffee, load 19g (+ or - to taste). Indent a small impression in the center of the grounds. It makes a difference for beginners in v60 to get an even pre-wet. It is extremely important to makes sure all the grounds are fully wet during this stage as dry areas will cause bubbling and channeling later in the brew.

4. Once water is ready off boil, allow it to cool to desired temperature (88C-92C OR 190F to 198F). Darker roasts will need lower temps while lighter roasts need higher temps as general rule.

5. Pour one ounce of water slowly into the center of the ground coffee then continue with deliberate circles outward until all grounds are wet. This should take a total of 10 seconds to completely wet the grounds.

6. Start your timer with a two minute count.

7. Allow the coffee to bloom for twenty seconds (+ OR - 10 seconds) after the last drip of the pre-wet pour. Some roasts will not bloom due to age or roast style, these make for difficult pour overs but can be rewarding with attention.


v60-8: Early pourv60-10: End pour for 1 cup @ 9ozv60- Final drawdown

8. Once the timer starts, allow the coffee to bloom and soak. In this example, we allowed it to sit for twenty seconds before pouring. The initial pour after pre-infusion is important because we want the grounds to unfurl evenly into a V shape as we slowly pour into the center. An errant or too fast pour can cause side channeling and it's best to avoid this. Pouring down the sides is also not recommended as this will agitate grounds and cause bitters in the brew. A reminder, this is not a pour and fill method so water that does not pass through the coffee will simply drain off quickly. The floating dome that forms an inch around the outside of the brew has an insular effect and it is not necessary to break this during the pour. In fact, results of washing the edges on the final pour have been very unpleasant.

v60- Spent grinds9. For this method, a steady pour of nine ounces from the twenty second mark until there are thirty seconds left on a two minute count has worked best. If the grind is set correctly, the last few drips will happen at or just after the timer goes off. For a larger v60-02, we would add a minute to the total time and adjustments to grind/dose/pour.

10. The resultant grounds should be evenly distributed and symmetry isn't necessarily a bad thing! Take notes, make adjustments and record the effects of those changes. A method can always be tuned from it's starting point to personal tastes.

Get started on this with the pour over mini pro pack.

For brew guides and other methods visit our education section.

Monday, November 23, 2009

v60 is better


v60- bloom diagram
, originally uploaded by coffeedirtdog.

Compared to other manual methods, v60 is unique because you have control over flow rate. In most every brew method, we can control the temperature, dose and grind. What's difficult is to control the flow rate or water debit in most manual brews.

Pour and fill methods like Melitta and Chemex are restricted by grind and drainage orifice. V60 has the signature ridged sides which allow for ventilation and side drainage while the drain orifice is large and won't restrict flow. A Chemex cannot drain from the sides and Melitta is restricted by the orifice, v60 has neither problem.

v60-Side view of drainage

What has been problematic so far with v60 is that many people are just brewing it like a Chemex and that does not produce the same results v60 were designed to achieve. Much attention needs to be put on the bloom and a proper preinfusion with a controlled pour technique. The results can be seen in an evenly extracted v shape in the brewed grinds.

v60- Spent grinds

For better results with the v60, start with one of our brew guides (available on request with an order) and adjust to taste. We will be posting a 1 cup how to guide soon. For wholesale or commercial training requests on any of the Hario products, please contact us directly as we will be happy to assist.

Monday, August 31, 2009

The hario 1 cup ceramic v60

The brown v60 1 cupper

Affectionately called the 'mini' in house, this little brewer takes a small dose and brews rather quickly. Where the 2 cupper is around a 3 minute brew, this little bugger knocks a minute off and delivers a single cup. It's the opposite of those 8 cup Chemex that are all the rage right now. One regular sized cup of coffee.

The little v60 is actually fairly simple to use. As long as the pour is even and the resulting grounds show an even, rather than lopsided dispersion, it probably brewed pretty well. The trick is setting the grind fine enough to get enough extraction and a slow enough draw down.

Remember to add a bit of pre-infusion to let the grounds bloom before pouring. 30-40 seconds with a couple of ounces is usually enough. For more info, get a detailed care/brew guide from the web store.

Saturday, August 29, 2009

New v60 gear


Sweet V60 Server, originally uploaded by TheClothMan.

We have a new cutie, the range server that matches the style of the Hario kettle as well as some sweet new ceramic v60 in red and brown.

Limited supply on these items so take a long look and then check out our updated coffee list. The Kenyas are up and Soma will come back into product in the next two weeks, give or take.

Sunday, February 01, 2009

The v60 style pour over

We were playing with some Chemex brews the last few days. Trying to get a bit more out of this brewer as it has become a go to method for a lot of people in the coffee scene outside of our region but initial observations tell us it isn't giving as good a cup as I would like. There are obviously varying degrees of acceptance among our group but I have not been impressed yet with a mix of techniques off that device. It seems to hide a lot of roast note and under develop without getting as nice an aroma as our other more familiar brewers. This could be because we haven't spent enough time with the method but we also had some other observations that made us think this brewer isn't necessarily our style. Given the comparable day to day methods we use for drinking our own cups: Abid full immersion brewer (which is heavier in body but mutes acidity), the v60 style cone pour overs (better aromatics), as well as the cloth pour overs (the best of both worlds when done well but it's hard to do well).

First thoughts in our group were that it has to do with the angles of the smaller Chemex we had. After a round of discussion though, it seems more simple. Ridges.

The method we really enjoy comes from techniques combined between this and this. Where a Chemex brews down through the layers, a v60 style brew has raised ridges that provide space for drainage on the sides, not just out the bottom. This means you have to be a little more detailed in how you pour because you can easily under extract by breaking the ring but it results in a better balanced cup. The tastes come out with more aroma and more nuance in the cloth method particlarly.

The hand made cone here is noteworthy because it is akin to Ben K.'s favorite pour over device, the cloth dripper. It's really simple actually, you pour in a circular motion into the center and the coffee and it extracts evenly through the cake which forms a V if done correctly. Be careful not to break the bloom and it will hold temp better and be more aromatic. Some arm chair quarterbacks have proffered that the open ventilation would somehow cool the brew but I would suggest unless you have brewed it with a temp probe and experienced the resulting cup(we have), it's better to test it than hypothesize. I will post a primer when things settle down but right now we are too busy to do it proper.

This methodical hand pour method is one where you have to really pay attention and it's a contrast to the method I keep seeing of pre-infuse and then fill which is no different really than most approaches to Melitta. I am not sure the kettle is as important to that method but it really does make a difference for that slow controlled pour you need on a v60. It represents a bit more work but the reward is in the cup. Check out this Hario promotional video for a few chuckles and a look at the dripper and v60 in action. We have a case of the nice ceramic v60's coming in to play with soon so keep an eye on the shop for an upcoming demo session.