Featured Post

Pour'd fonts and way back when we worked on Luminaire, Toast, and others

Most coffee people may not have heard of the  Luminaire hot water font unless you were around back in the day. It was a project that some g...

Showing posts with label brew_guide. Show all posts

Monday, December 05, 2011

Pour over cheat sheet

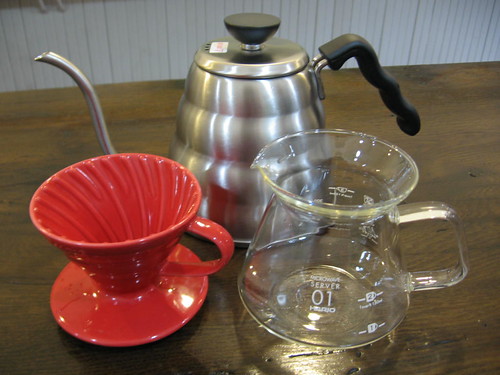
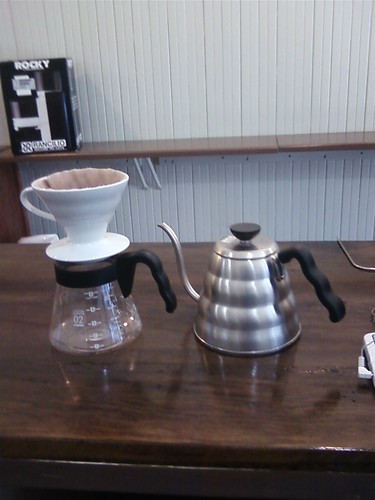
Here’s a quick cheat sheet to help you get the most out of your home Hario V60 and Buono kettle set-up.

Before you pour:

1) Temperature: After your water is done heating, make sure it is the correct temperature. All of our coffees have a recommended brewing temperature on the bottom left side of the front label.

2) Rinse: It’s important to rinse the filter. Doing so helps to get rid of unwanted paper-y tastes and also helps ‘stick’ the filter evenly inside of the V60 Dripper. This also pre-heats your v60 and Linkrange server (or cup). You can do this with the water while it’s cooling down to the ideal brewing temperature. Just don’t forget to toss the water before you brew!

3) Fresh: Grinding fresh should be the last step prior to actual brewing. This and a fresh roast can ensure the freshest cup of coffee possible.

v60-Side view Pre-Infusion:

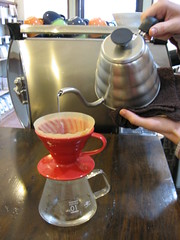
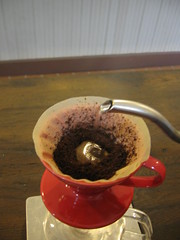
Place the coffee in the filter and make a small divot in the center of the grounds. Start from the center of the bed of coffee and, in a spiral, work your way to the outside of the V60. At this point, you only want to evenly wet the grounds. Start your timer, and wait 15-20 seconds (or until the bloom stops bubbling and settles). You should see the coffee begin to expand, or bloom, and then settle slightly during this phase.

Brewing:

After the coffee has bloomed, start pouring again from the center of the coffee. Work the stream of water in a spiral evenly toward the outside of the V60. Be careful not to touch the outermost edges of the coffee bed with water. This prevents water from running directly down the side of the V60 without passing through the coffee. Continue to pour evenly spiraling in and out until you have reached the recommended yield (end brew volume) for your V60.

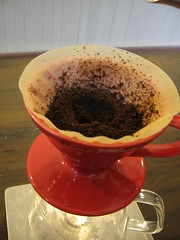
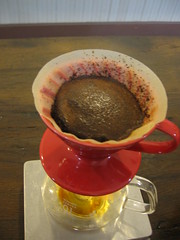
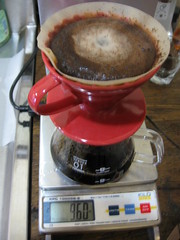
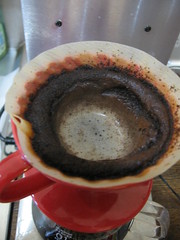
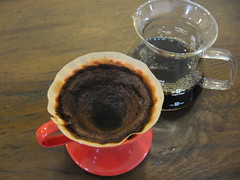
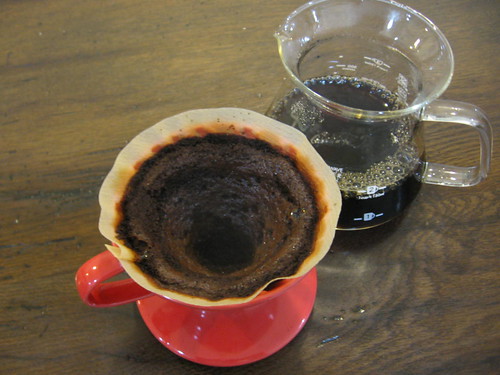
After you have finished brewing, the bed of coffee should look concave as opposed to flat. This is a sign that the coffee was evenly extracted.

Other tips and recommendations:

1) When you are pouring, the water should look like it’s falling from the kettle, almost like a tail. An aggressive pour can result in channeling, and improper extraction. You can place your free hand at the top of the kettle to help control the flow rate. A kettle gicluer helps to control the flow rate even further and is a highly recommended addition to your V60 set-up.

2) If the time for the water to drain from the grounds and enter the range server after your final pour takes longer than 30 seconds, your coffee might be ground too finely. If the water drains through the bed of coffee quickly after the final pour, your flow rate might be too fast and the grind too coarse.

3) A 1 cup v60 takes 2-3 minutes for a brew while a 3 cup takes 3-4 minutes. See our brew guides in our shopping section.
---

The V60 system is one of the most clean and satisfying brew methods around, but it can take many tries to really get it down. As long as you are using the correct temperatures and dose, maintaining an even flow, and distributing the water correctly, in no time you will be making pour-overs that rival some of the finest coffee-bars around. - Steve J.

Tuesday, August 09, 2011

Iced Coffee

There are four basic types of iced coffee that are used and I'll cover them briefly:

(The Boston Globe is about to let loose a big article on iced coffee so here's our take on it!)

Standard iced coffee: Brew a regular drip brew and refrigerate it. It's the easiest way to make cold coffee by far but the least interesting flavor profile. We recommend glass only for storage containers and consume quickly after brewing due to the short shelf life. Flavor profiles are similar to regular hot coffee but thinner, weaker and often less interesting.

Double strength over ice: This can be made with varying portions of coffee to water and some people even add water after brewing. The idea is to brew straight over iced and drink immediately. While it's fresher, in theory it sounds great, but this type of brew shocks over the ice and acidity is stronger while body and texture are lacking. Varying methods of this have been around for as long as drip coffee has been around. In fact, Starbucks recommends this method as their own suggestion for iced coffee so it has wide acceptance for it's ease in preparation. Doing this as a per cup pour over was also recently misreported by the NYTimes as being 'Japanese Iced' method (we should call regular pour overs 'Japanese Hot Coffee' by that example). It is not however a method we particularly find rewarding across the board for all coffees and is by no means the most complex or absolute ice coffee method available. It tends to work better on coffees that are lighter roasted but not for medium or darker roasts.

Cold drip: There are many versions of this worth trying but the most obvious is what persistently is called Kyoto Style Coffee. The complex version relies on a needle valve where room temperature water drips at rates as slow as one drip per second through the grounds. This may takes several hours to drip through. On the larger scale brewed at room temperature, the resulting brew can change radically as it rests and can turn quickly into less pleasant flavors. This slow drip style results in heavy base notes and winey flavors. We have found that brewing at room temperature yields some unpleasant results so we use a variation of this. We've used a simple medium cupping grind loaded into a pour over or Syphon top with filters in place works well with ice in the refrigerator. Loading ice on top of the grounds and keeping the whole process chilled takes several hours longer to brew but can produce a really interesting cup. The key is not having an excessively coarse grind and brewing cold. This allows more origin character to come through and produces excellent coffee. This method works better for medium and darker roasts.

Cold brew: Much like ice drip, there are versions and caveats to this particular full immersion method. The classic version of toddy is to take a bucket of water and load a large cloth bag full of grounds much like steeping tea. This is typically done with french press grind and at room temperature. With such a coarse grind causing so much under-extraction, very few origin characters come through and the dominant flavors are cocoa, toffee, and caramel. This brew can oxidize, sour, or simply turn while being brewed at room temperatures that are hotter than normal so be advised. The sediment that is a byproduct can be quite acrid so storing for any period of time can also have varying results. We actually disavow this method in that the results are often silty, rancid, and lacking in complexity. We choose to use a variation on this we have experimented with extensively that we think is exceptional:

'full immersion' cold brew (aka Reposo Frio)
For this you will need:
Gram Scale
Large Carafe (Glass) or Midzudashi
Burr Grinder with adjustable settings
Bamboo Stirrer or tablespoon
Coffee filter (metal or cloth)
1 liter of clean filtered water
60-80 grams of medium roast whole bean coffee

1. Grind the coffee to a medium grind (cupping grind for professionals). This would be coarser than a drip grind but finer than a french press grind.

2. Load the ground coffee into the carafe.

3. Pour water over the coffee.

4. Stir vigorously.

5. Place in the refrigerator for 18-24 hours.

6. Gently stir the crust of floating coffee and let rest in the fridge again for 20 minutes to let grounds settle.

7. Pour the coffee through a filter. We recommend a cloth filter for the best texture and a pristine sediment free cup. Please ask for cloth care suggestions while in the shop or through email.

This style cold brew has complexity and character with great texture, mouth feel, and body. the key is using cold water and storing cold throughout the process. The choice of coffee is how we tune the flavors we want so you can have fruit, florals, and special character as well so explore the range! The other upside is that it's stable and stores well for several days in glass carafes with lids if cloth filtered. At the resulting strength, it can be diluted with one part water but we recommend drinking it at full strength with smaller portions. A 5oz gibraltar glass with one ice cube being my favorite serving.

Wednesday, December 08, 2010

A little information about potential pour over filters

There are three basic kinds of filter medium wide spread in use in the industry we would like to talk about: Paper, metal, and cloth.

Paper as a filter medium: Everyone always says paper wicks away oils and flavors. What you need to know is that rinsing paper filters help but many paper filters are just going to taste like paper. To really understand this, you need to stop drinking coffees with paper filters for a while and then come back to it. The contrast really makes it clear.
The other thing you need to know is that fines will build up against the walls of the filter (subject to the shape of the filter). Cumulatively, we describe the tastes from paper as thin, brighter, and crisp. Look for paper filters that are less thick and avoid brown filters.

Metal as a filter medium: Metal mediums (much like glass) depend highly on the hole sizes (and their spacing). Amounts of fine particulate are expected to pass through to the resulting cup. The effects in taste notes are simple, regardless of what form factor. This filtration that lets sediment through will have more body, more texture, less clarity, and can result in an over extracted harsh taste in the cool cup (from sediment). The fine particulate should be avoided and compensated for in methodology as much as possible.

Cloth as a filter medium: Cloth is unique and a bit unorthodox these days. It is the only filter medium in common use that has natural depth filtration. The fines will be trapped effectively and oils will pass through resulting in a heavier cup with great clarity. Cloth is hard to care for and can easily impart off flavor notes if not rinsed properly after use, cared for in between uses, and cleaned properly as needed. It also requires a seasoning brew the first time it will be used! That's a lot of work so we often recommend cloth for the diligent or advanced user.

Sidebar: Surface Filtration vs Depth Filtration + Cake Filtration
Surface filtration is where the filter medium keeps all particles, that do not pass through at the surface of the filter, on the surface. Depth filtration allows for particulate to pass through the surface layer and into the depth or layers of the medium. This means that the finest particulate is less likely to build up in a layer on the surface and is captured in that depth.

Cake filtration happens in the brew cake of a pour over (espresso pucks as well). As the grinds settle in a brew cake, the layers of grounds act themselves as a filter. This extra bit of filtration is dependent on two things: depth and agitation. Two good examples of cake filtration are the narrow top chamber of a Syphon and the shallow wide brew puck in a Clover brewer. Unlike a Syphon, the brew chamber design in a Clover has a shallow puck with very little cake filtration. (However, by whisking or strong late agitation, a brew cake will not form and have little to no effect on filtering the resulting brew of a Syphon).

This is why we push for less circular stirring agitation in Abids/Syphons/Clover, less pours around the edge of the brew cake in hand pour, and less aggressive pouring (lower steady flows are better). To achieve more clarity and layers of flavor in the resulting cup, a focus on achieving cake filtration seems essential.

We recommend paper if rinsed well for the every day user, cloth for the advanced or technical focused, metal filters for those who are looking for most ease of use. Cloth is our favorite in shop as it works extremely well for the volume we have. Some time ago while in Japan, I played around with and got a Cafeor (a metal screen filter v60) from Hario which is similar to the K-One (has larger holes spaced differently). We found that it worked reasonably well with it's screen configuration where the screen was only about 60% of the surface area but the sediment was still a problem. We adjusted our method quite a bit to compensate for the sediment and found a coarser grind, longer pre-infusion bloom, and dumping the first drops during pre-infusion helped. The sediment though proved for a often unpleasant cool cup and we much preferred the results we get in Syphon and Cloth hand pours.

Aside from the Cafeor, our trainer and an engineering friend played with the new K-One. Neither liked the results and were caught off guard by the enthusiasm others had when tasting the same cup. Regardless, we are going to play in shop with one tomorrow care of Dylan Evans who is gonna bring it in to give it a full working over. I believe our experiences with the Cafeor will hold true. We've tested everything and choose to stick with the methods we like the most regardless of how difficult or complex they get as long as we can find a way to execute consistently with them on bar.

In the end, choice of filter medium is really about a match of personal taste, patience for details, and ease of use. Try them all and work until you find what you like.

Saturday, January 30, 2010

About this pour over thing

This is a scan from a Hario campaign piece for v60. We linked to it earlier but I felt like we needed to explain it a bit more after seeing Sweet Maria's video set on Pour Over Part 1, Part 2, Part 3.

The Hario Adv reads as follows:
Step 1: Pour freshly ground coffee, your choice, in the the dripper. Shake lightly to level.

Step 2: Pour hot water slowly, little by little, to moisten the grinds, starting at the center. Let drip 30 seconds.

Step 3: From the center, pour water in a circular motion, not letting it touch the paper filter. Brew the coffee for 3 minutes total.

Step 4: When the brew reaches the measurement line, remove the dripper.

The points to take away from this are simple. Prewet with just enough water to wet the grounds and let bloom for 30 seconds. Then pour in a deliberate and circular motion without pouring at the edges of the paper for a total time of 3 minutes. It can be compared to a little more technical and specific to our roast style version of the v60-02 in our brew guide section.

Pouring at the edges is the one that really gets me. Why do so many people think this is a good idea to wash the grinds away and allow water to flow out the sides of the filter (and not through the coffee)? Rhetorical question because the answer is, they are brewing it like a melitta or chemex.

The earlier mentioned videos are a good example of brewing the v60 like a Melitta and getting results that lead to criticism. The grind and pour rate are 'kinda important' and I think that was missed in a video review that will mislead a lot of home users. Seeing someone use an incorrect grind and then use a pour method that would only work with a pour over device that restricted flow is difficult to watch.

I wouldn't normally note something that looks more like a disguised sales pitch for Abids than honest exploration but there were vague references throughout the video and criticisms of v60, kettles, and references to 'some people' that seemed to be aimed at our methods or in the very least, those that agree with us.

I guess what irks me is not the talk but the continued criticism of hand pour by people who do not have a depth of knowledge or any real experience on the subject. It's as if hand pour with kettles and all the methods never existed and were not widely used in Taiwan and Japan for many years already but only came into existence with their recent growing popularity. I believe the language barrier accounts for a lot of that but there is also a certain arrogance that comes with many of the voices in our coffee community.

We all talk as barista about the old Italians that may come in every now and then to lament either the cup/espresso not being hot enough or the shot not being lungo, or simply unwilling to acknowledge anything that isn't old world Italian style as being good espresso. This resistance to hand pour methodology is the same thing as the bias these Italian espresso drinkers can carry for the old ways.

Failing to acknowledge there exists a library of kettles and per cup methodology well beyond those we are commonly exposed to with Hario and the knock off Bonmac brewers is our own shortsightedness and arrogance. The potential usefulness of these items is not explored unless we put the time and effort into them. The first step in that though is to explore their design and intended use, not to measure them unfairly by applying an incorrect methodology. Ignoring design when evaluating a product is a statement about the reviewer more than the product itself.

The more intriguing aspect is that I think we are on the verge of a coffee cultural shift toward full manual per cup and the old guard are fighting to have a say in it or simply attempt to voice some kind authority on the subject. If this is the case, as it has happened many times before in the last decade of our current coffee culture, it should be interesting to see which side takes the message to the bank.

Tuesday, January 26, 2010

Adjusting the grind

Our approach to espresso is the same as our approach to manual methods. It involves eliminating (by controlling or making fixed) the majority of variables. Our approach to espresso has been to work from a point of the ideal situations for time, temperature, volume, and dose backwards. Once we find the sweet spot in an espresso, it becomes a formula of adjusting the grind to account for environmental or outside factors.

So, we use our ideal settings for dose, time, and temp as rather fixed and then tune the grind to adjust volume as needed.

The same approach is taken with Syphon as it is with all hand pour methods we work with. Find an ideal set of parameters and work backwards. Determine an ideal temperature relative to dose, timing, and volume.

For our Syphon methods, grind is easy to adjust. Once you choose a dose, temp, and brew volume relative to a specific time. In this instance, we choose the draw down time as the coffee comes from the top to the bottom globe. We treat it as a fixed value which for our method, relative to our specific dose and time, which is 30 seconds. Change the brew time or dose significantly and this value of 30 seconds becomes a bit arbitrary, needing a recalibration.

For v60 and other free pour methods like the Cloth Flannel Woodneck, grind is not alone in affecting the brew volume. The pour rate has a large effect.

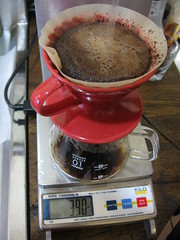
For beginners to v60, we recommend using a scale underneath to measure pour rates. Rather than using it for resulting brew volumes, we use it as a measure to know for certain we have (for example) poured 6 ounces in the first minute. Knowing the rate of pour is a good way to pin that down as a variable and then adjust the grind.

In the same way as we do the Syphon, we choose the last 30 seconds for draw down in the one cup method as a point for grind calibration. If we stop pouring at 30 seconds and the last drips flow through before the time is up, the grind is too coarse. If there is substantial water left, the grind is too fine.

This is, of course, subjective to dose and whether the pour itself created an even dispersion of grinds in the filter bed.

The summary being, we attempt to hold all variables firm to the only one that is most effective in compensating for environmental variables, the grind. The grind has an effect on flow and resulting brew volume so the key is constantly adjusting the brew volume back towards ideal throughout the day with a fixed dose, time, and temp.

Tuesday, November 24, 2009

How to: The v60 1 cup 9 ounce method

v60-1: 1 cup setup
1 cup Range server, 1 cup v60, and Kettle


You will need:
Kettle
v60 1 cup
*1 cup range server
v60 filter (paper or cloth)
A gram/ounce scale
Thermometer (preferably digital)
Coffee and Grinder
Filtered hot water


v60-2: Balancing the kettleThe following method is for a 9 ounce cup to approximate traditional US style drip coffees. With a slightly adjusted grind and slower speed of pour, a smaller resulting volume in the same amount of time can be brewed for more intense origin characters.

1. Rinse filters (cloth or paper) before each use with water off the boil. This will remove some unwanted tastes and warm the v60 itself. A rinse also helps hold the paper filters into place.

2. Use a cloth underneath the kettle when pouring for balance and to avoid burns. For best results with the Hario Kettle, a slight tilt on it's side can help control the slower pour speeds.


v60-4: Divet in groundsv60-5: Prewetv60-6 : Preinfusion bloom

3. After freshly grinding freshly roasted coffee, load 19g (+ or - to taste). Indent a small impression in the center of the grounds. It makes a difference for beginners in v60 to get an even pre-wet. It is extremely important to makes sure all the grounds are fully wet during this stage as dry areas will cause bubbling and channeling later in the brew.

4. Once water is ready off boil, allow it to cool to desired temperature (88C-92C OR 190F to 198F). Darker roasts will need lower temps while lighter roasts need higher temps as general rule.

5. Pour one ounce of water slowly into the center of the ground coffee then continue with deliberate circles outward until all grounds are wet. This should take a total of 10 seconds to completely wet the grounds.

6. Start your timer with a two minute count.

7. Allow the coffee to bloom for twenty seconds (+ OR - 10 seconds) after the last drip of the pre-wet pour. Some roasts will not bloom due to age or roast style, these make for difficult pour overs but can be rewarding with attention.


v60-8: Early pourv60-10: End pour for 1 cup @ 9ozv60- Final drawdown

8. Once the timer starts, allow the coffee to bloom and soak. In this example, we allowed it to sit for twenty seconds before pouring. The initial pour after pre-infusion is important because we want the grounds to unfurl evenly into a V shape as we slowly pour into the center. An errant or too fast pour can cause side channeling and it's best to avoid this. Pouring down the sides is also not recommended as this will agitate grounds and cause bitters in the brew. A reminder, this is not a pour and fill method so water that does not pass through the coffee will simply drain off quickly. The floating dome that forms an inch around the outside of the brew has an insular effect and it is not necessary to break this during the pour. In fact, results of washing the edges on the final pour have been very unpleasant.

v60- Spent grinds9. For this method, a steady pour of nine ounces from the twenty second mark until there are thirty seconds left on a two minute count has worked best. If the grind is set correctly, the last few drips will happen at or just after the timer goes off. For a larger v60-02, we would add a minute to the total time and adjustments to grind/dose/pour.

10. The resultant grounds should be evenly distributed and symmetry isn't necessarily a bad thing! Take notes, make adjustments and record the effects of those changes. A method can always be tuned from it's starting point to personal tastes.

Get started on this with the pour over mini pro pack.

For brew guides and other methods visit our education section.

Monday, November 23, 2009

v60 is better


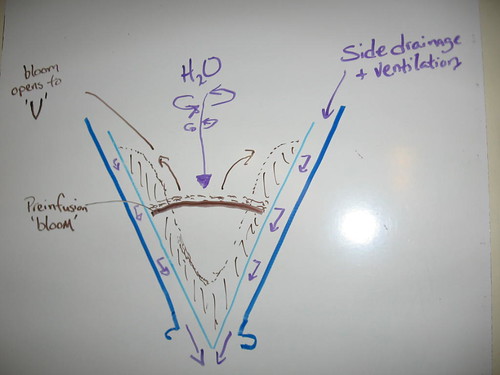
v60- bloom diagram
, originally uploaded by coffeedirtdog.

Compared to other manual methods, v60 is unique because you have control over flow rate. In most every brew method, we can control the temperature, dose and grind. What's difficult is to control the flow rate or water debit in most manual brews.

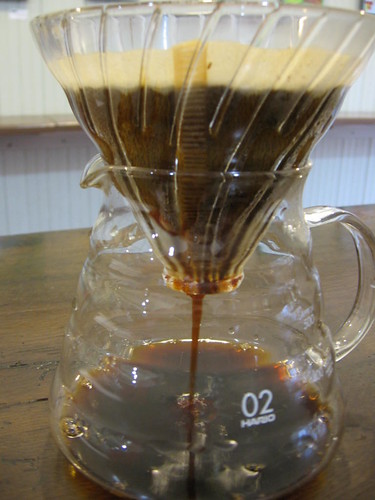
Pour and fill methods like Melitta and Chemex are restricted by grind and drainage orifice. V60 has the signature ridged sides which allow for ventilation and side drainage while the drain orifice is large and won't restrict flow. A Chemex cannot drain from the sides and Melitta is restricted by the orifice, v60 has neither problem.

v60-Side view of drainage

What has been problematic so far with v60 is that many people are just brewing it like a Chemex and that does not produce the same results v60 were designed to achieve. Much attention needs to be put on the bloom and a proper preinfusion with a controlled pour technique. The results can be seen in an evenly extracted v shape in the brewed grinds.

v60- Spent grinds

For better results with the v60, start with one of our brew guides (available on request with an order) and adjust to taste. We will be posting a 1 cup how to guide soon. For wholesale or commercial training requests on any of the Hario products, please contact us directly as we will be happy to assist.

Saturday, August 15, 2009

Replacing syphon filters

There's a trick to getting a new vac pot filter on. First thing is to get some replacement cloth filters.

Once you remove the old cloth, boil some water to rinse the new cloth through. A trick Ben C. showed me is that you have to start with a warmed and wet cloth filter and stretch it tightly when tying it on. Taking a little time to rinse it with water and then stretch it out making certain there are no folds or areas of crimping at the edges before tying it tight is essential.

The reasoning for this is largely that the filter needs to be tight but also that the filter needs to set flush in position against the glass when brewing. Any crevices or uneven spots around the edge will allow steam bubbles to gurgle from the sides of the filter. This is uncontrolled agitation and will add unpleasant bitterness (not unlike whisking the grinds excessively during brewing). Make sure that filter sits flush when brewing.

Sunday, August 09, 2009

Method guides


The Hario Kettle works best, originally uploaded by TheClothMan.

We will start sending out general method guides and care guides with items like the ceramic v60 and cloth filters. We will slowly be adding these to orders. Keep an eye out for notes on the shopping section about availability.

Sunday, February 01, 2009

The v60 style pour over

We were playing with some Chemex brews the last few days. Trying to get a bit more out of this brewer as it has become a go to method for a lot of people in the coffee scene outside of our region but initial observations tell us it isn't giving as good a cup as I would like. There are obviously varying degrees of acceptance among our group but I have not been impressed yet with a mix of techniques off that device. It seems to hide a lot of roast note and under develop without getting as nice an aroma as our other more familiar brewers. This could be because we haven't spent enough time with the method but we also had some other observations that made us think this brewer isn't necessarily our style. Given the comparable day to day methods we use for drinking our own cups: Abid full immersion brewer (which is heavier in body but mutes acidity), the v60 style cone pour overs (better aromatics), as well as the cloth pour overs (the best of both worlds when done well but it's hard to do well).

First thoughts in our group were that it has to do with the angles of the smaller Chemex we had. After a round of discussion though, it seems more simple. Ridges.

The method we really enjoy comes from techniques combined between this and this. Where a Chemex brews down through the layers, a v60 style brew has raised ridges that provide space for drainage on the sides, not just out the bottom. This means you have to be a little more detailed in how you pour because you can easily under extract by breaking the ring but it results in a better balanced cup. The tastes come out with more aroma and more nuance in the cloth method particlarly.

The hand made cone here is noteworthy because it is akin to Ben K.'s favorite pour over device, the cloth dripper. It's really simple actually, you pour in a circular motion into the center and the coffee and it extracts evenly through the cake which forms a V if done correctly. Be careful not to break the bloom and it will hold temp better and be more aromatic. Some arm chair quarterbacks have proffered that the open ventilation would somehow cool the brew but I would suggest unless you have brewed it with a temp probe and experienced the resulting cup(we have), it's better to test it than hypothesize. I will post a primer when things settle down but right now we are too busy to do it proper.

This methodical hand pour method is one where you have to really pay attention and it's a contrast to the method I keep seeing of pre-infuse and then fill which is no different really than most approaches to Melitta. I am not sure the kettle is as important to that method but it really does make a difference for that slow controlled pour you need on a v60. It represents a bit more work but the reward is in the cup. Check out this Hario promotional video for a few chuckles and a look at the dripper and v60 in action. We have a case of the nice ceramic v60's coming in to play with soon so keep an eye on the shop for an upcoming demo session.

Sunday, September 21, 2008

The Syphon Primer Companion

Forward: With Syphon brewing becoming tragically hip lately, we decided to go back and do a comprehensive look at our development in this Simon Hsieh inspired methodology for the Hario TCA-2 and how it has expanded in our community.

We started getting deep into Syphon more than a year ago. It was when we had access to some of Simon Hsieh's coffee and were inspired to understand more that we became serious. We adopted his methods off his blog and began an exchange with him about coffee and brewing in general that has really shaped our current direction away from where our community was headed (see Clover) at the time. We quickly adapted as much as we could understand and began quantifying the methods. We spent time evaluating why each step was important in the brewing process and where could we go with it. We attempted a basic video that got solid feedback and that was the beginning of a series of steps focused around Syphon brewing and demos.

We did demos here in town for small groups, traveled out west for a friend's Jam, and shared the methodology with others who were interested. Which brought us back to the beginning when Simon Hsieh visited us in the US. Some hands on technique was applied and some extra movements were removed to simplify and refine our brewing method. A few autographed copies of his book for good measure and a Syphon demo event topped the visit.

Fast forward to the future and you see competing methods being posted on other sites and more discussion about this old school method but more to the point, three of the six USBC finalists use a version of our preferred method!

So as we are moving on to new subjects we decided to compile a comprehensive primer and updated video people can use based on our experience. This is especially relevant as we now have the TCA-2 for sale at the brick and mortar shop. Enjoy~


The Complete Syphon Primer

Barismo Syphon Primer Demo

barismo: Syphon Coffee Primer

by Benjamin Chen (based on Simon Hsieh method).
For brewing with a Hario TCA-2
Before you start:

1. Rinse your filter in hot water and wash with cold water until it runs clear.
If this is a new filter, run through the brewing once without coffee to get rid of the cloth smell.

2. Rinse your Syphon to make sure it's clean. Check for cracks, Dry all exterior and make sure the lower globe is secured.

3. Hook the filter to the top. Make sure it's centered.

4. Pre-boil water in kettle and prepare a cold, damp towel.

5. Place ~35g of beans in the grinder. Run a little bit through to clean up previous grinds.


Heat-up:

1. Fill hot water to the "2" mark on the side of the lower globe. These are little number inside a cup logo near the "hario" mark. (this works both for TCA-2 and TCA-3).

2. Insert upper chamber at an angle into the lower globe. DO NOT seal the top.
Make sure there is a gap for steam to escape.

3. Start your burner and place it in the center of the globe. Set it at max to speed up the heating.

4. Grind the bean into a container/cup. Scoop from the top, 32g of coffee into another cup. I recommend using the cupping cups. They are of nice size. Try to finish this step as close to "drop" as possible, but you can grind/weight before step 1 to avoid messing up.

5. Watch the water in the lower globe start to boil. At the sign of boiling (rapid bubble formation), straighten the top and lightly seat it. Do not "push/seal" the top hard. A very gentle downward pressure is enough. Make sure the top is center and straight.

6. Place the thermometer probe on top, near the bottom of the chamber, away from the center.

Adjust the burner to as low as you can without water falling from the top globe.

7. Watch the temp on top stabilize. There should only be very tiny bubbles and no turbulence. If you have leakage from the side, shift the filter with the stirring paddle until it's sealed. If you cannot get rid of that, start over and re-adjust the filter.

9. If your stabilized temperature is less than 91C, replace the top and increase the heat until it increase to 91C. If the temperature is more than 91C, stir the water on the top w/ your paddle rigorously until it decrease to 91C. (note: 91C is your target brewing temperature. Adjust per degree or roast... see further notes at the end).

10. Get your stirring paddle, coffee, and timer ready to go.

Drop:

1. When water temp stabilizes to 91C, take out the thermometer probe.

2. Hold the coffee on your left hand and stirring paddle on your right.

3. Dump the coffee into the top chamber and immediately start the timer with your pinky finger.

Start your stirring immediately.


1st stir:

Below is my personal technique. You can do whatever you want. Just make sure you do not create any vortex, saturate the coffee completely, and finish your move in 5 sec. The faster the better.

Longer/vortex stir will result in bitterness in the cup...

1. Holding the paddle like a pen with the flat section parallel to the "x-axis" (left-n-right).

Starting on the left most of the "circle", stick the paddle into the coffee.
Move the paddle in a "N" motion (up, down, up) toward the right. You should be able to do 4 "stokes" in about a second.

2. Repeat the motion along the "y-axis" if you felt more agitation is needed.

3.Start from the very top (+Y), "scrape" the side of the top clock-wise 180 degrees.

Repeat the motion counter clock-wise.

If you did the stirring correctly, you should have something like this:
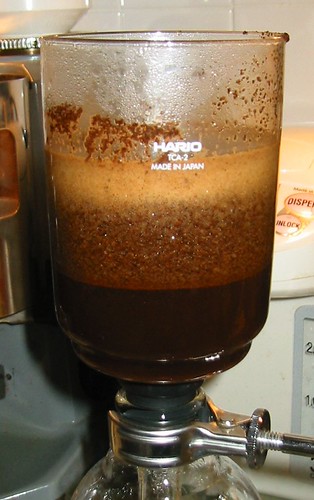


If you do not see the pale "crema" on top, that means your grinds are not fully saturated. Don't be afraid to REALLY stir up the grinds (as long as you don't create a vortex/whirlpool).

Stirring is the hardest part of the whole thing. Takes some practice to get use to. Whatever you do, make sure everything is well mixed, no vortex is created, and do it in 5 seconds.

An Aeropress paddle works REALLY well for stirring ;-)

*Tip about stirring: a lazy rhythmic motion actually works better than fast and violent motion.

Basically you are creating "waves" that crash into each other, mixing the top and bottom layer of the coffee.

2nd Stir:

When the timer hits 30 seconds, do a second stir. Sometimes when the coffee are fresh, it will be really sticky and you will felt like you aren't stirring at all. Make sure you DO stir it well like your first stir. You should see mostly black layers of coffee when you are done.


3rd Stir:

1. At 55 sec mark, turn off the heat and remove the burner from the lower chamber. Stir immediately. When done properly, you should only have a top layer of light-colored coffee of no more than 1/4" (~6 mm) thick. (Note: After your stir, pay attention to how much coffee remained on the top. The thicker the layer is, the less of extraction it got. Work on your stirring if it's the case.)


Draw down:

1. Immediately after 3nd stir, wrap the cold, damp towel on the upper left side of the lower globe near the "neck" (right side is where the handle is). Make sure the wet towel does not touch the lower portion of the bottom globe where the flamed touched.

2. The draw-down should be around 30~50 seconds. Darker roast and higher dose will increase the draw-down time. Longer drawn-down results in continued/over-extraction and will cause bitters in the cup.


Clean up:

1. When the draw-down is complete, wrap the towel with your left hand around the neck of the vacpot (the metal ring); holding the top with your right near the top rim, gently rock the top back and forth until it comes loose. Careful it's a bit hot.

2. Holding the top with your left hand, gently tap the rim downwards with your right to loosen the grinds. Dump the spent coffee and rinse with water.

3. Release the hook and take out the filter. Wash both top and the filter as clean as you can.

4. Place the filter in a small cup of hot water. The water will turn brown immediately. Shake the filter to rinse it for about 10 sec, then rinse with cold water until it run clear. Submerse the filter with clean cold water and store it (outside if you use frequent, in the fridge for longer term storage).

5. Pour the coffee out and rinse the lower globe both inside and out. After some usage, a brown stop might appear near the very bottom. This is most likely dried coffee.
Soaking it in cafiza once in a while takes that right off.

6. Wash your paddle and clean your towel.


Parameters for various methods:

Grind setting:

1. Super Jolly = 24~26 small notches coarser than espresso grind

2. Rocky = 27~30 from true "0" (burrs touching) fineness should be similar to table salt.


Directions for TCA-2/3:

Dark Roast (> Full City):
Temp = 89~90.5C
Dose = 20~30g (28 recommended, decrease if you have a lot of trouble stirring)

Light Roast (< Full City):
Temp = 90.5~92C
Dose = 24~32g (32 recommended)

1st stir = right after drop
2nd stir = @ 30sec
3rd stir = @ 55sec

note 1: temp is measured at the bottom, away from the center of the syphon top.
note 2: keep the stir under 5 seconds. Stir to fully saturate the grinds but not creating a vortex. A zig-zag/cross pattern works well.
note 3: kill the flame right before the 3rd/final stir. The top won't drop down
on you for another couple seconds.


Method II (aroma enhancement):

Roast: City+
Dose: 32g
Temp: 91C

- Same as method 1 but SKIP the 2nd stir @ 30sec.
- Keep the stir under 3 sec if possible

Method II will have thinner extraction compared to method I but preserves aroma.
Works wonders for a certain roast style/bean but under extracts most coffee. Use w/ caution.

Definition for full city is right before 2nd crack to 10 sec into 2nd. City+ is 30~60 sec after 1st ends.

And that is it. I think that is about as detail as I can give without step-by-step photos. Feel free to email with any more questions.


Tips:

- A Zojirushi hot water pot is a great companion to the Syphon (and any manual coffee methods).
- The timer a thermometer probe similar to what was used in the video is great with vacpot (and any manual coffee methods).

Thursday, June 26, 2008

Mis-understood drip

Drip Coffee, photo by Ben Kaminksy

To many, drip coffee is the ugly blemish that they want to forget. I mean, no self-respecting "waver" will ever allow that dreadful Fetco compared side by side with Clover at their shops. The truth is, drip coffee accounts for quite a bit of business and is probably the most common method that home users (the normal kind, not your "geek" type that make up very small percentage of the market) utilize to prepare their daily coffee.

I have to admit that we too had our own bias against drip a while back. From our earlier experiences, the drip cup profile just did not have the intensity and flavor that a Syphon or Espresso profile possessed. It was not until we started to dabble in manual pour technique and have a better understanding of the roasting process that we finally understood the potential and power in drip coffee.

Just like ANY other coffee brewing techniques, when tuned with proper dose, temperature, time and roast, a cup of drip coffee can be just as flavorful, intense and satisfying as a vacpot cup. In fact, at a recent home gathering, a coffee drinking friend told me the cup of drip I prepared for him is nearly as intense and flavorful as a shot of espresso.

The following is my drip brewing technique. This method is based on the one presented in Simon Hsieh's book with my tweaks to tune for my machine/coffee/roasts.

The gears:
- Presto Scandinavian with modified shower head
- Mazzer Kony
- Melitta #4 filter - white (note 1)

Parameters:
- Use 10~14g per 6oz of water. Adjust if the cup is too intense for you...
- A fine grind (10~15 small notches from espresso on Mazzer SJ, 18~21 notches from true zero on Rocky).

Grind Setting, photo by Ben Kaminksy
Steps:
1. Fill the machine with approximately 8oz of water. Start the machine without coffee/filter in it. This preheats the machine.
2. Grind coffee while the machine pre-heats.
3. As soon as the machine is done pre-heating, place coffee in the basket, level the grinds (note 2), and start brewing immediately (before the machine cools down).
4. Turn the machine OFF after about 20 seconds. For me, this is about 3 "gurgles". The purpose of this is to pre-infuse the coffee and allow all the grinds to be saturated(bloom) before starting the remaining extraction. You will have to experiment with the timing of this cut-off - just pull the basket out to see if all the grinds are properly wet at various time.

Pre-infusion, photo by Ben Kaminksy

5. Turn the machine back on after 20 seconds of wait time(the end of pre-infusion).
6. Complete the brew within 3~4 minutes if possible. Play with the dose to find out the optimum capacity of your machine. For my Presto, the upper limit is at around the 5 cup mark.
7. Remove the carafe immediate after brewing and serve.

Spent ground, photo by Ben Kaminksy

That is it. With a little bit of care, this simple method can produce just as good of a cup as with most other brew methods!

Cup of Drip, photo by Ben Kaminksy

note 1: I like Melitta filters because the small holes in the paper seem to allow a bit more oil to pass thru; not as much as a cloth filter but is better than any paper filter I've used. To me, the natural/brown paper filters are quite foul and imparts a very strong brown paper bag taste to any liquid that passes thru. If you insist on using it, please rinse it with some hot water first to reduce as much of the off flavor as possible. And for those of you who just have to use a gold/metal filter, please be aware that your brew time will be altered due to the different flow rate. It will flow a bit faster than the paper filter and will most likely require a even finer grind setting to achieve the same dwell time (which puts even more sludge to the cup... hmmm... gritty...).

note 2: Simon advocates shaping the coffee mound in the basket to match that of the shower head - putting divots where the exit holes are located (imagine using the shower head to make an indention on the coffee mound). Since I have modified my shower head to have near full coverage, it does not make much of a difference for me. For those machines with limited water exit holes, try Simon's recommendation to see if it makes a difference.

Tuesday, May 29, 2007

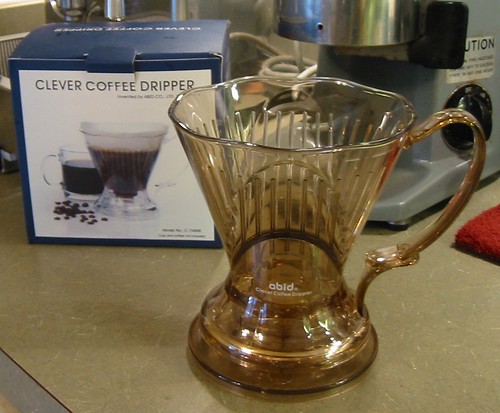
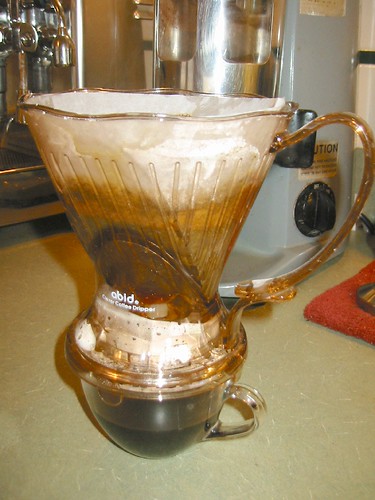
Abid "clever" coffee dripper


Other than vacpot (aka syphon), hand pour is another very popular coffee preparation method in Asia. In fact, it is the preferred method for non-espresso brewing method in Japan.

I've been wanting to try out this method for quite some time as I was told it made a different cup profile than vacpot. However, I never follow thru as I am intimidated by the various methodology and tools it required. I was also told it is a very technique-dependant method and can be quite inconsistent from operator to operator.

I first notice this little coffee gadget from mojocoffee's website. I was intrigued by its simplicity and promised ease of use. It's basically a pour-over cone with a stopper valve - you get the cleanness of the drip cone with full extraction of a french press. Best of all, it is stupid simple to use, very consistent, and takes less than 2 min from brewing to clean-up.

I made a request with my brother who is currently vacationing in Taiwan, and couple weeks later I got the unit delivered to my door.

Upon opening, I was quite impressed with the packaging. The graphic design is very well done (no "AS SEEN ON TV" style packaging here). Coupled with the high quality plastic (medical grade imported from Japan), it really made the unit felt substantial.

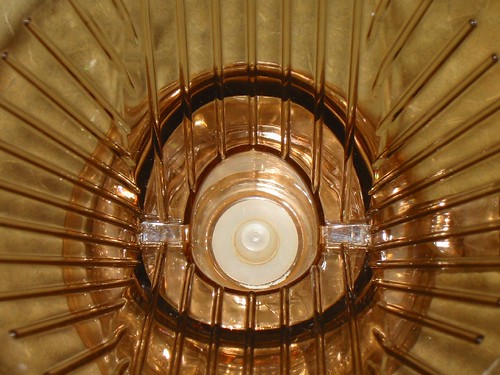
The design of the unit is very simple. It is basically a drip cone with a tiny plunger at the bottom of the unit. The plunger is connected to a plastic disk/ring. When the dripper is placed on its legs, the plunger will sealed the drip hole due to the weight of the plastic disk. When placed on top of a cup, the rim will push the disk up, lifting the plunger, and allow coffee to pass thru. The concept is so simple yet it worked so well.


The brewing procedure are as followed:

1. Place paper filter in the cone. If desired, run some hot water thru to "wash" away paper taste.

2. Add coffee to the dripper. I use 32g per a full dripper brew (~ 12oz, ending w/ ~ 8oz of coffee).

3. Add hot water (198~202F, depends on the coffee) to the dripper. Make sure the grinds are well agitated. Stir if necessary.

4. Wait 1 min. Stir to break-up the crust.

5. Place the dripper on top of cup and let it drain. The drip time is roughly 60~90 seconds depending on the grind fineness.


That is it. Clean up involved tossing away the paper filter and rinse the dripper. You get a cup that is aromatic, full flavored, and clean with a total dwell time of roughly 2 min (+ 60-90seconds of drain time).

"Clever" coffee dripper is clever indeed.


- Ben C.